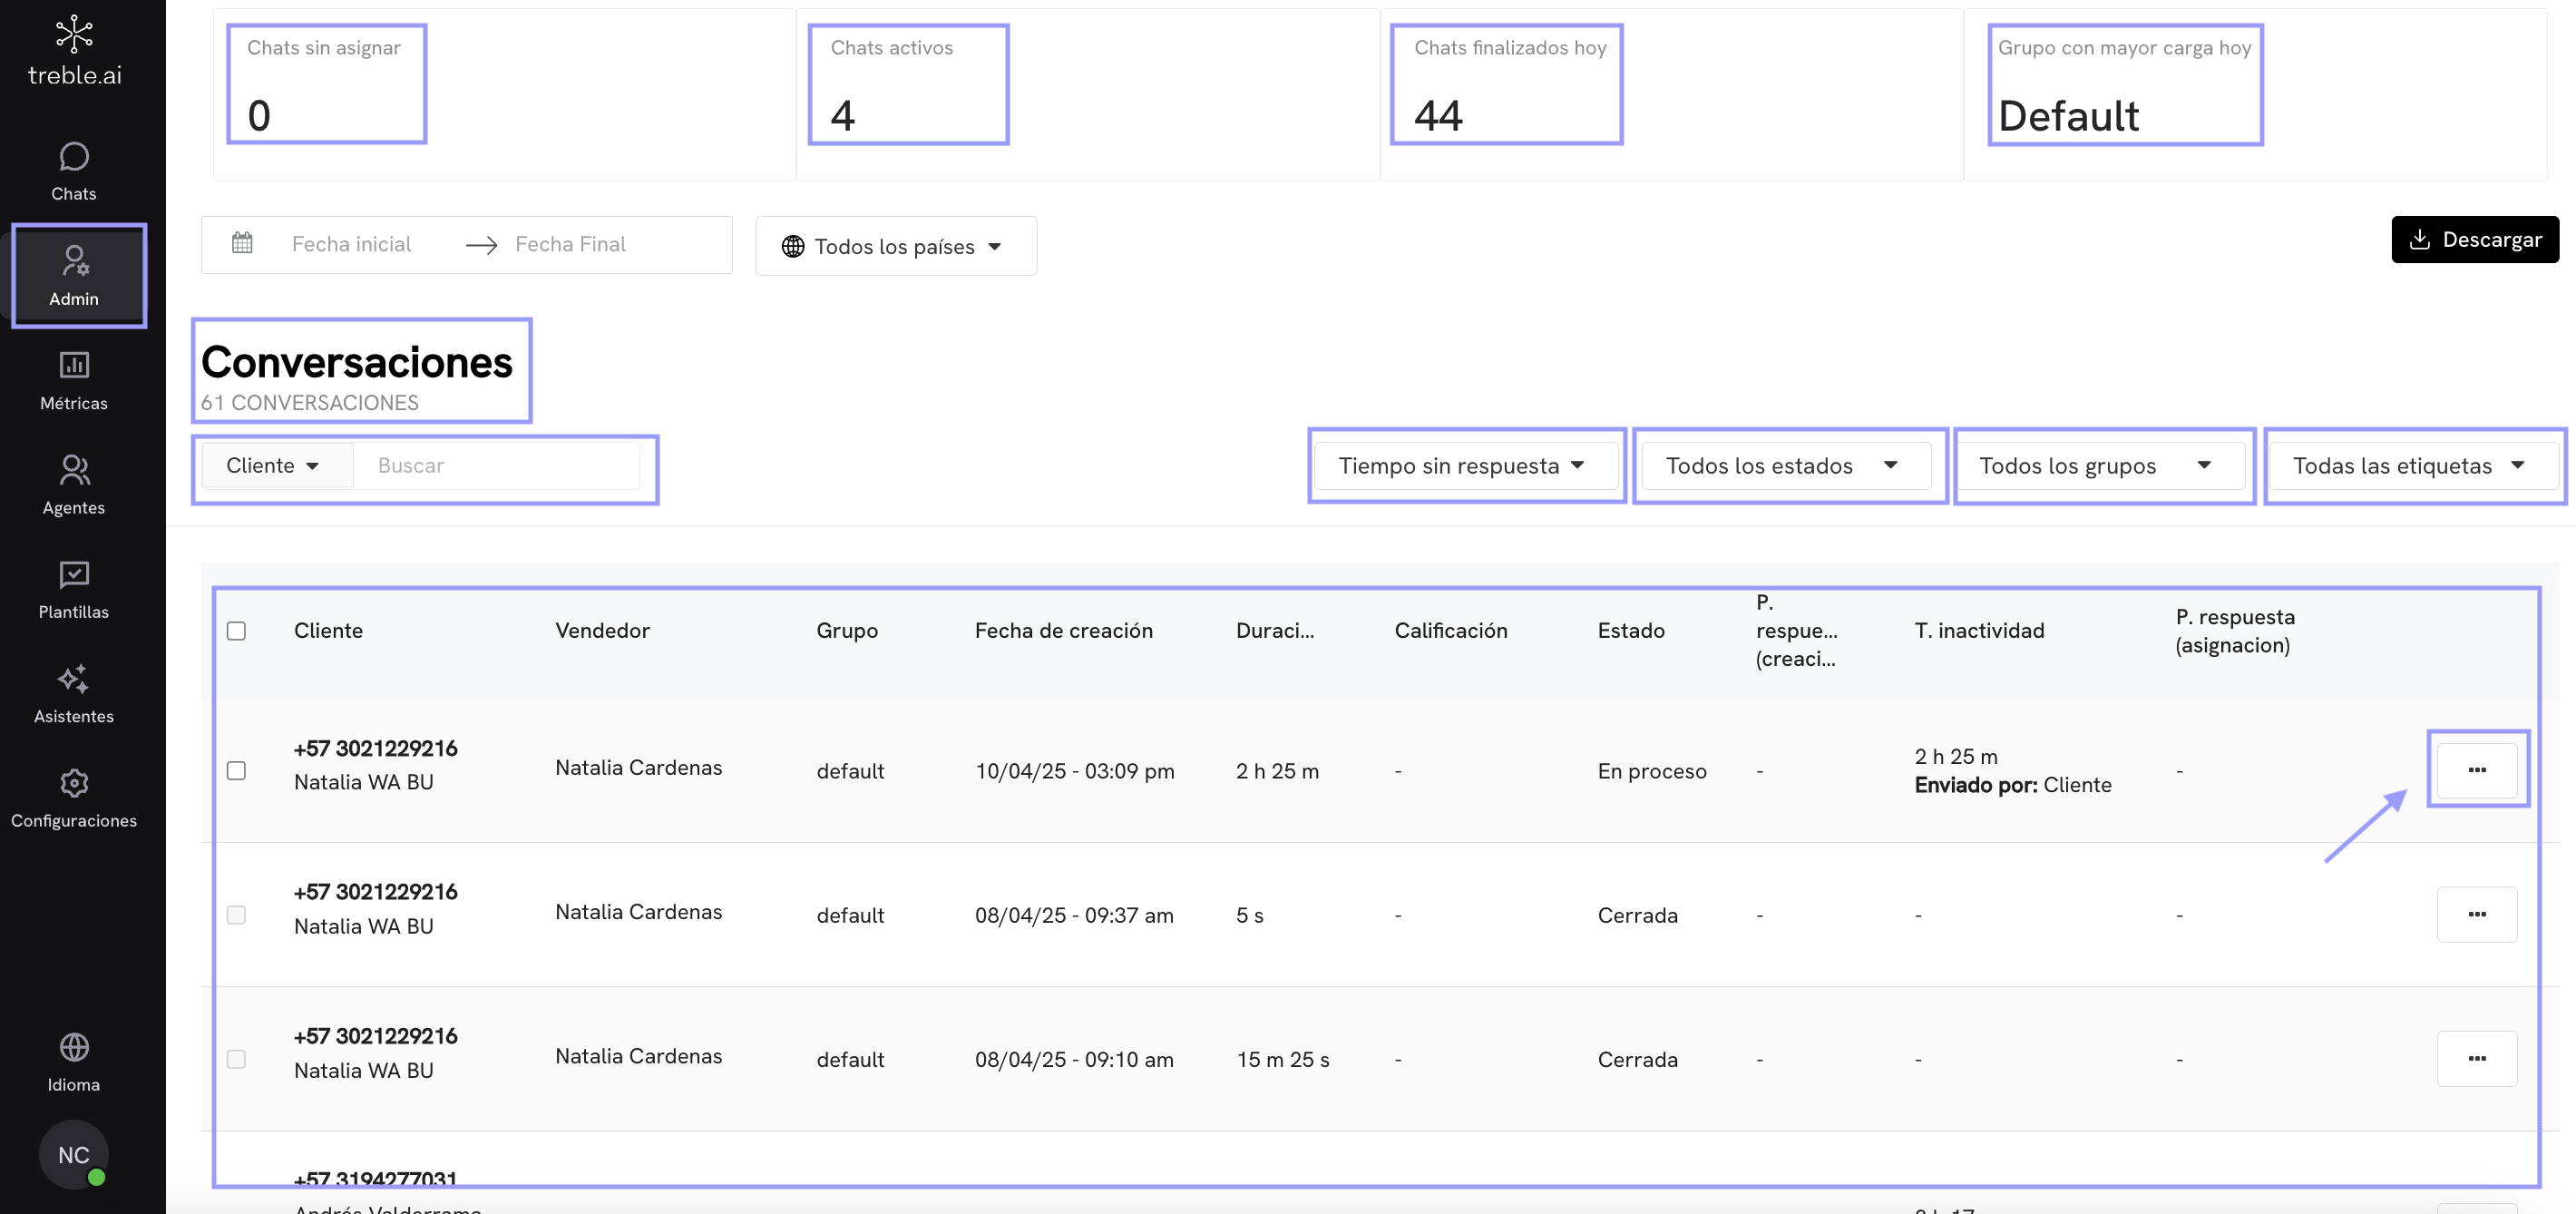
Conversations View
The administrator can filter by customer (with phone number or name). By response times, by statuses (assigned chats, completed chats), by groups or teams and by tags. Additionally, in each chat you can select the 3 dots to view the chat history, its notes and/or transfer it.Main Metrics
In the upper section of this view, you will see the main conversation metrics. You can view:- Unassigned chats: These are chats that haven’t been assigned to any agent.
- Active chats: These are chats that have been assigned to an agent.
- Chats completed today: This is the number of chats that have been completed by an agent.
- Group with highest load today: This is the group with the most assigned chats.
How to review conversations from the admin panel?
From the Admin > Conversations section, you can view in detail all the interactions your agents have with customers. This centralized view allows you to audit performance, verify the status of conversations, and understand your team’s workload.What information can I access?
When entering the Conversations section, you will see a list of all conversations registered in your account. Each row in the list represents an individual conversation and shows the following information:- Customer: Phone number and identifier assigned in WhatsApp.
- Salesperson: Agent who handled the conversation.
- Group: Group to which the agent belongs (for example, “default”).
- Creation date: Exact moment when the conversation started.
- Duration: Total time the conversation lasted.
- Rating: Optional rating if the customer left a note or score.
- Status: Can be “In progress” or “Closed”.
- Inactivity time: How much time has passed since the last message.
- Response time (creation): Time between the creation of the conversation and the first message received.
- Response time (assignment): Time between the agent assignment and their first message.
- Sent by: Indicates if the initial message was sent by the customer or the agent.
Available Filters
At the top of the module, you can apply different filters to find specific conversations:- Date range: Define from which date to which you want to search.
- Country: Filter by the customer’s country.
- Time without response: Ideal for detecting inactive conversations.
- Conversation status: Open, closed, or in progress.
- Agent group: To visualize the workload by team.
- Tags: If you have custom tags to better organize your flows.
What can I do with each conversation?
By clicking on the three vertical dots (⋯) at the end of each row, you will access more options, such as viewing the complete chat history, forwarding the conversation, or taking administrative actions (depending on your role permissions).Transfer a chat as an administrator
By clicking on the 3 dots of a chat, you will see the options to transfer the chat to another agent or group. By clicking on Transfer, you can select the agent or group to which you want to transfer the chat.- If you select a group, the chat will be transferred to one of the agents belonging to that group. The rules for assigning chats to agents are handled from the configuration panel.
- If you select an agent, the chat will be transferred directly to that agent. To select an agent, you must click on the agent’s name and then one of the groups to which they belong.
How to view chat history and notes?
By clicking on the 3 dots of a chat, and then View details, you will see the options to view the chat history, view the chat notes, and transfer the chat. By clicking on Conversation, you can see the complete chat history. By clicking on Notes, you can see the chat notes.