What is Meta verification?
Meta verification is a fundamental process to ensure the authenticity and security of business accounts on Facebook and Instagram. Verifying your business portfolio is necessary to use WhatsApp Business API; however, verifying your business will also help you with other Meta products such as advertising. By verifying your business, you also prevent identity impersonation, which protects you from fraud and protects your reputation.Why is Meta verification necessary?
Meta requires verification to confirm that your business is legitimate and to prevent fraud. In turn, Meta needs to verify that your business complies with WhatsApp Business API policies. You can check Meta’s policies at the following link:Meta Policies
By completing this process, you can:- Increase the security of your business assets.
- Access advanced features such as advertising campaigns, WhatsApp Business API, and more.
- Comply with Meta policies and avoid unexpected blocks.
Where is Meta verification done?
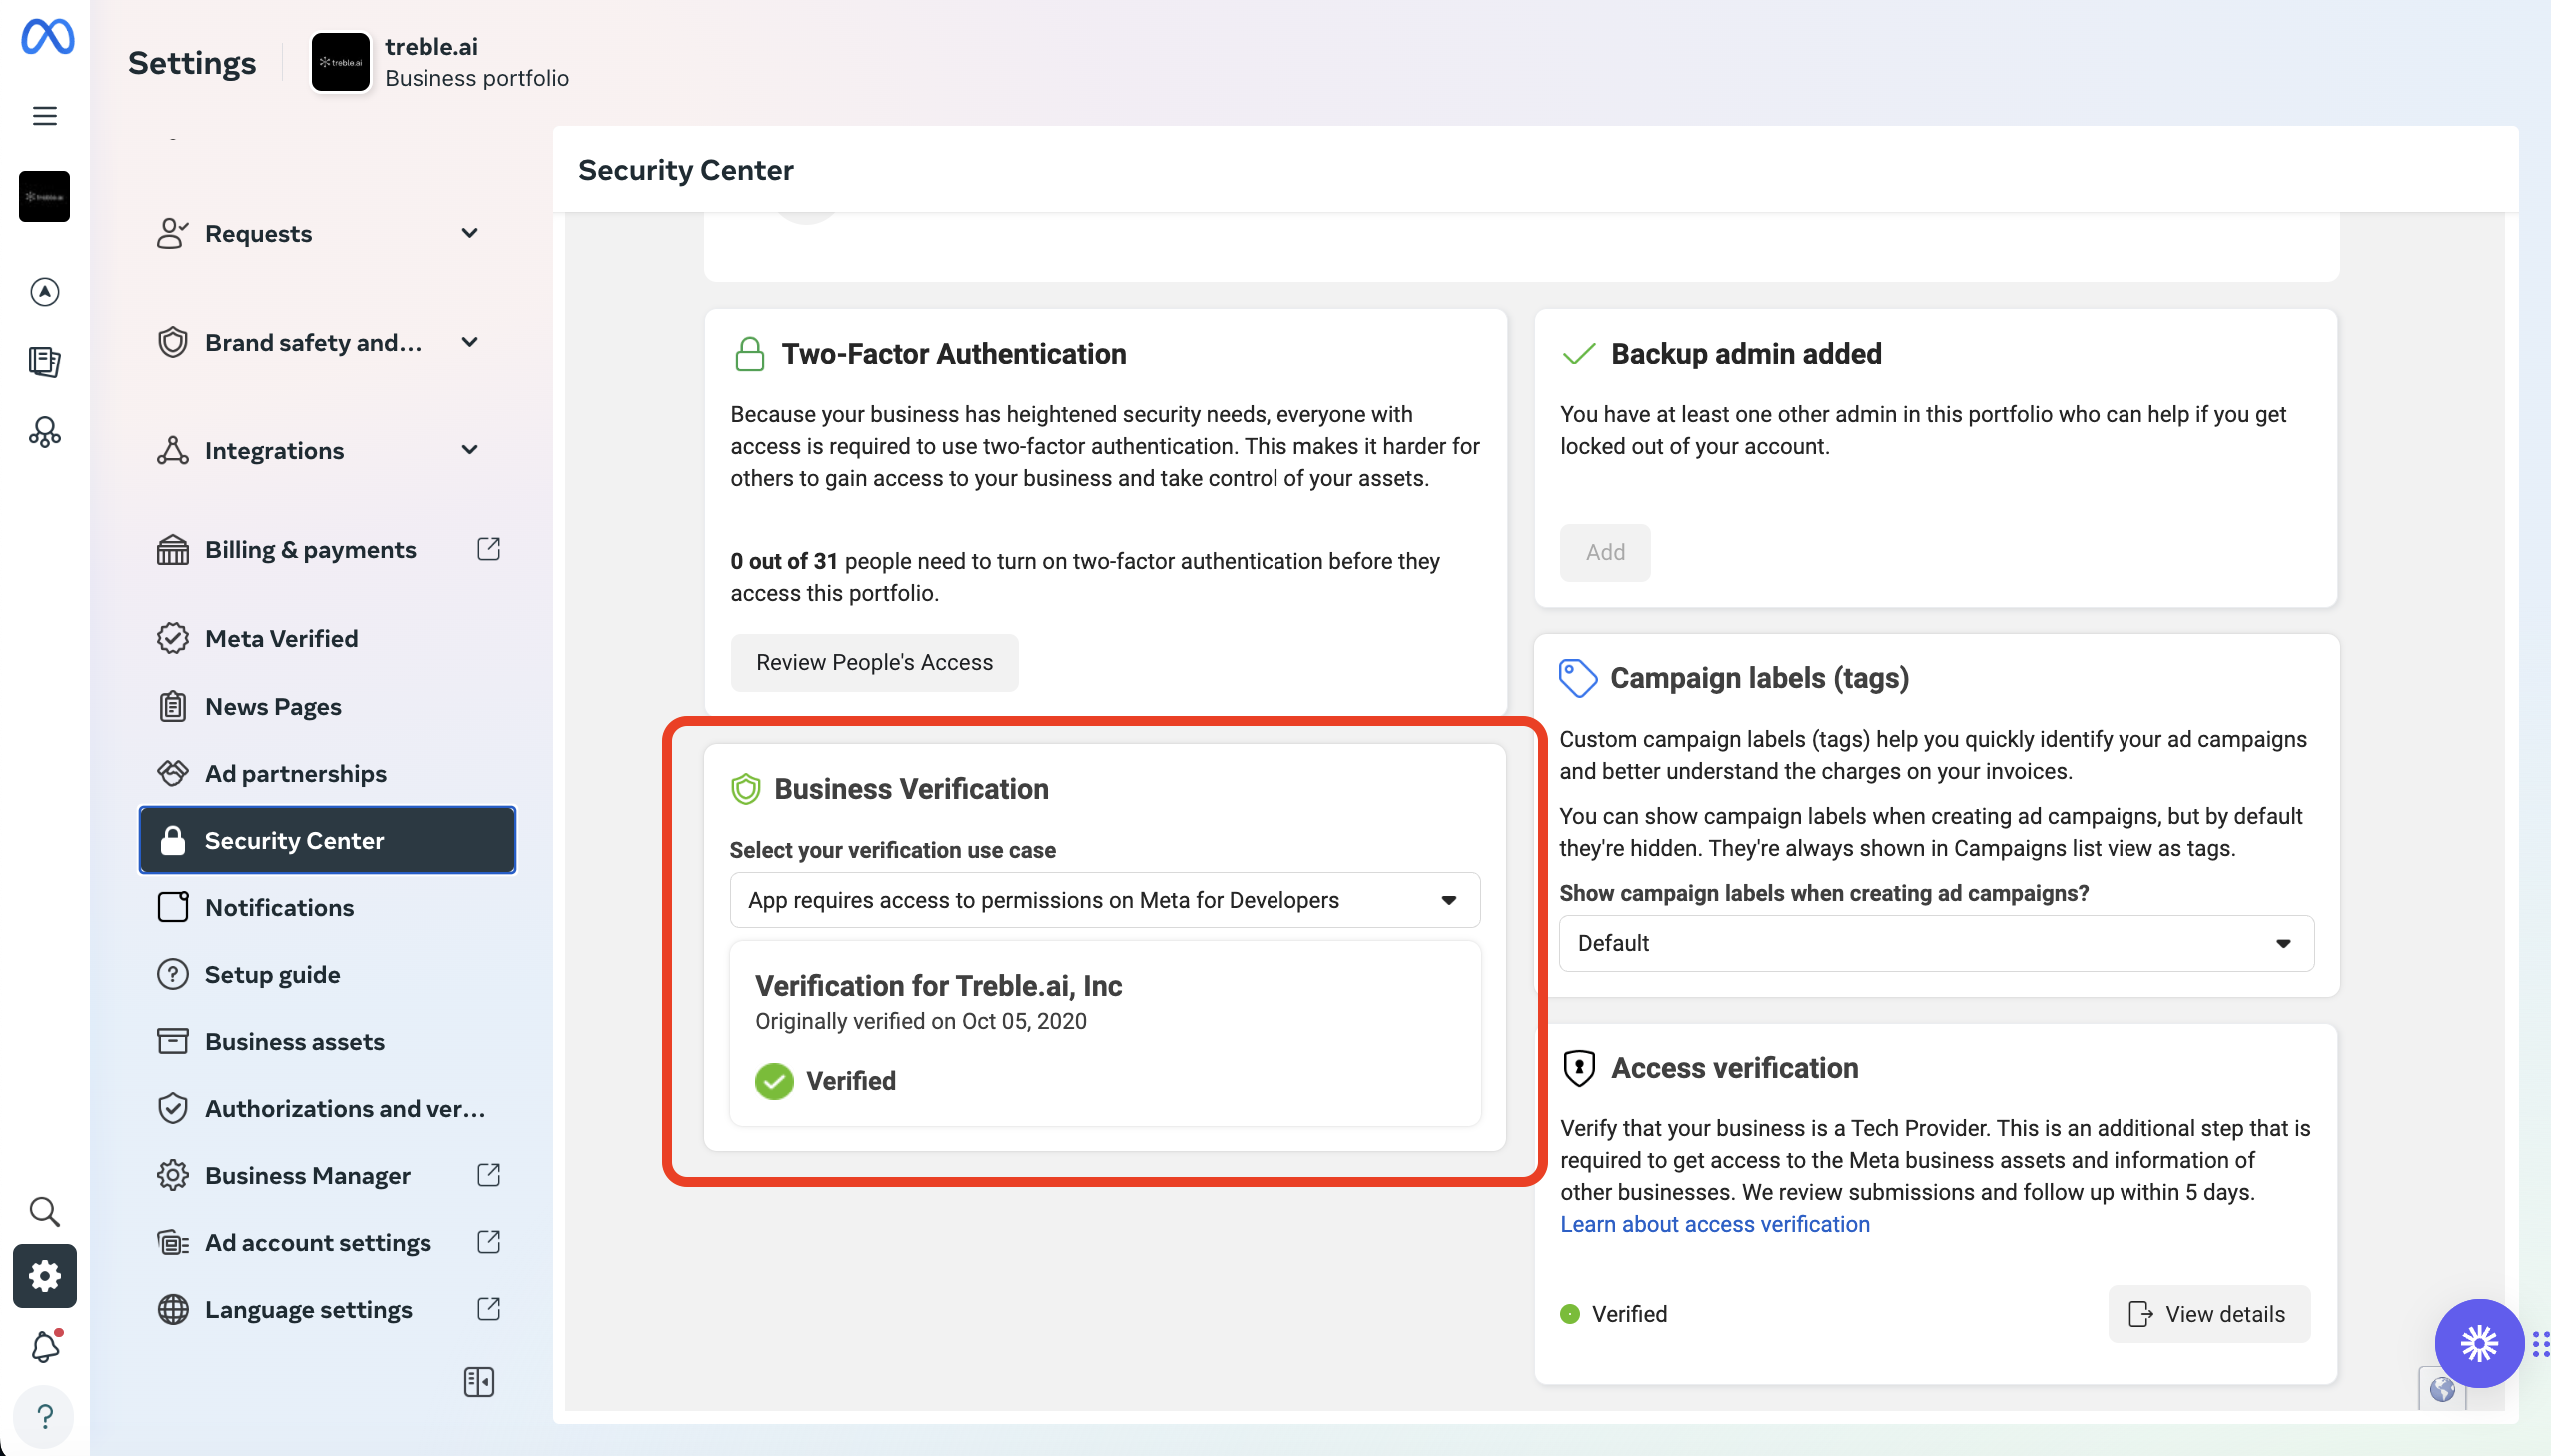
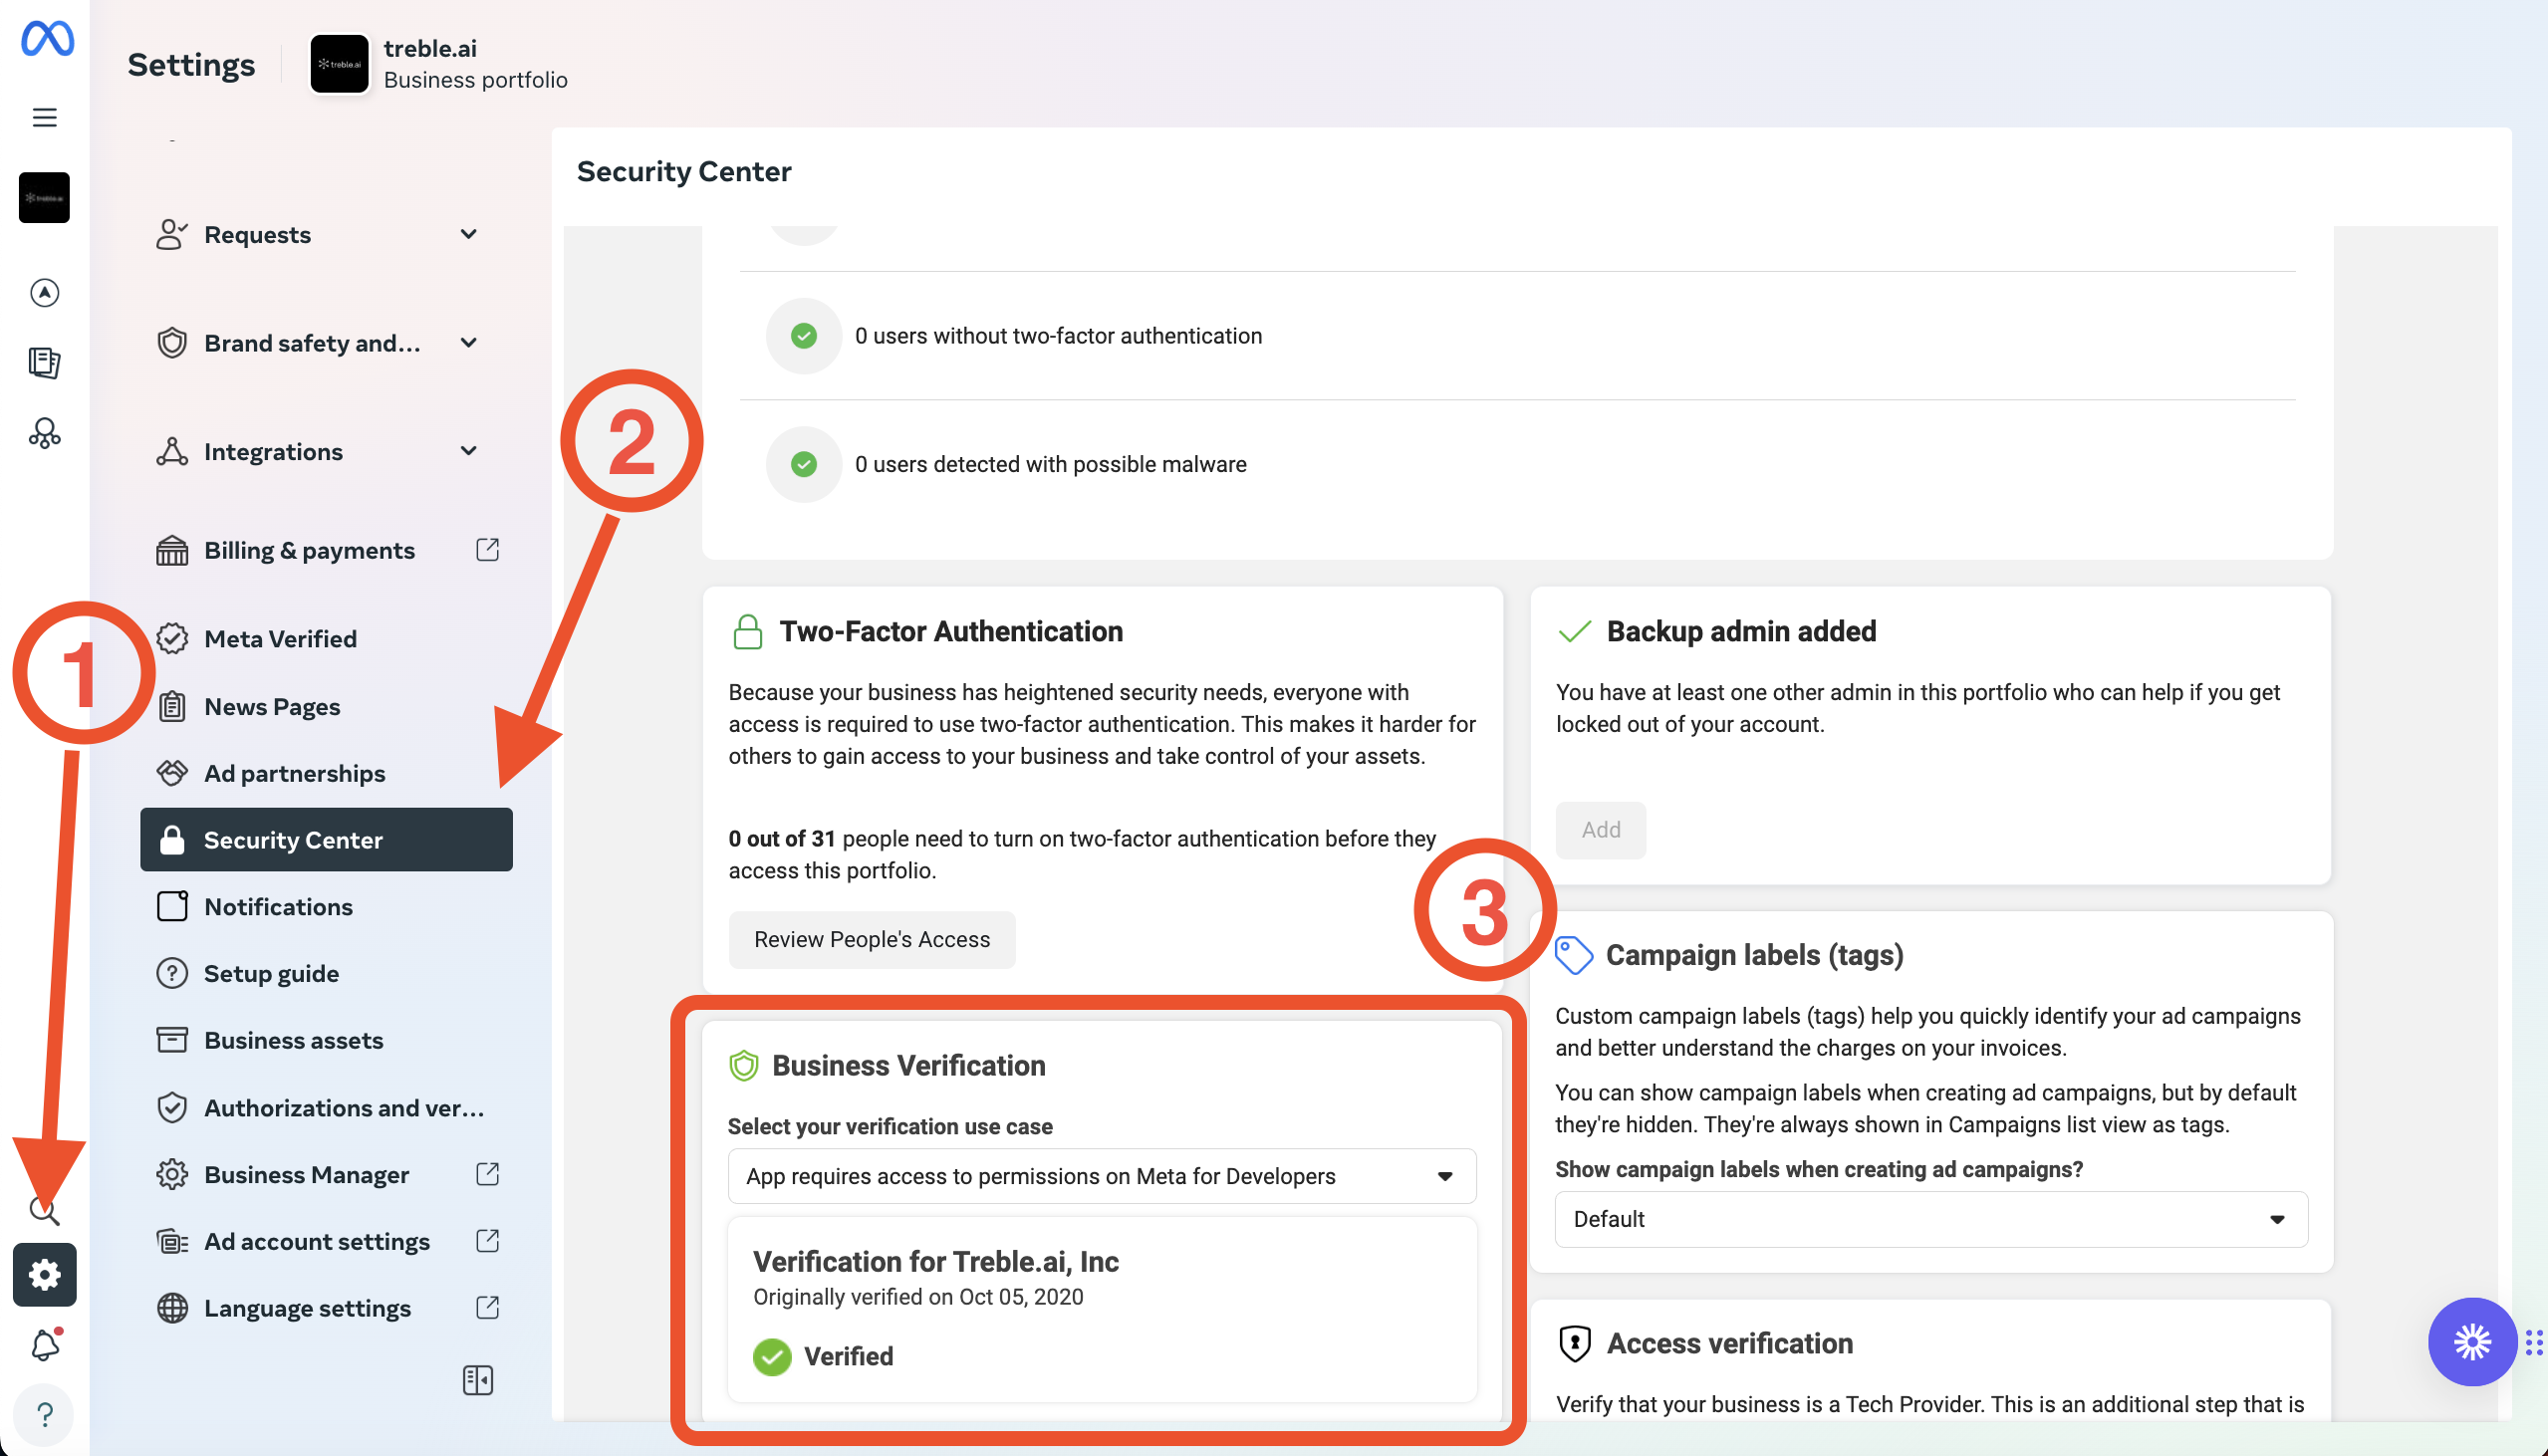
You can complete the verification in the Security Center within Meta Business Manager. To access:- Log in to your Meta Business Manager account by accessing
- Click on Settings in the left menu
- Find the Security Center by scrolling in the Settings section and click on it. (You may need to enter your two-factor verification code)
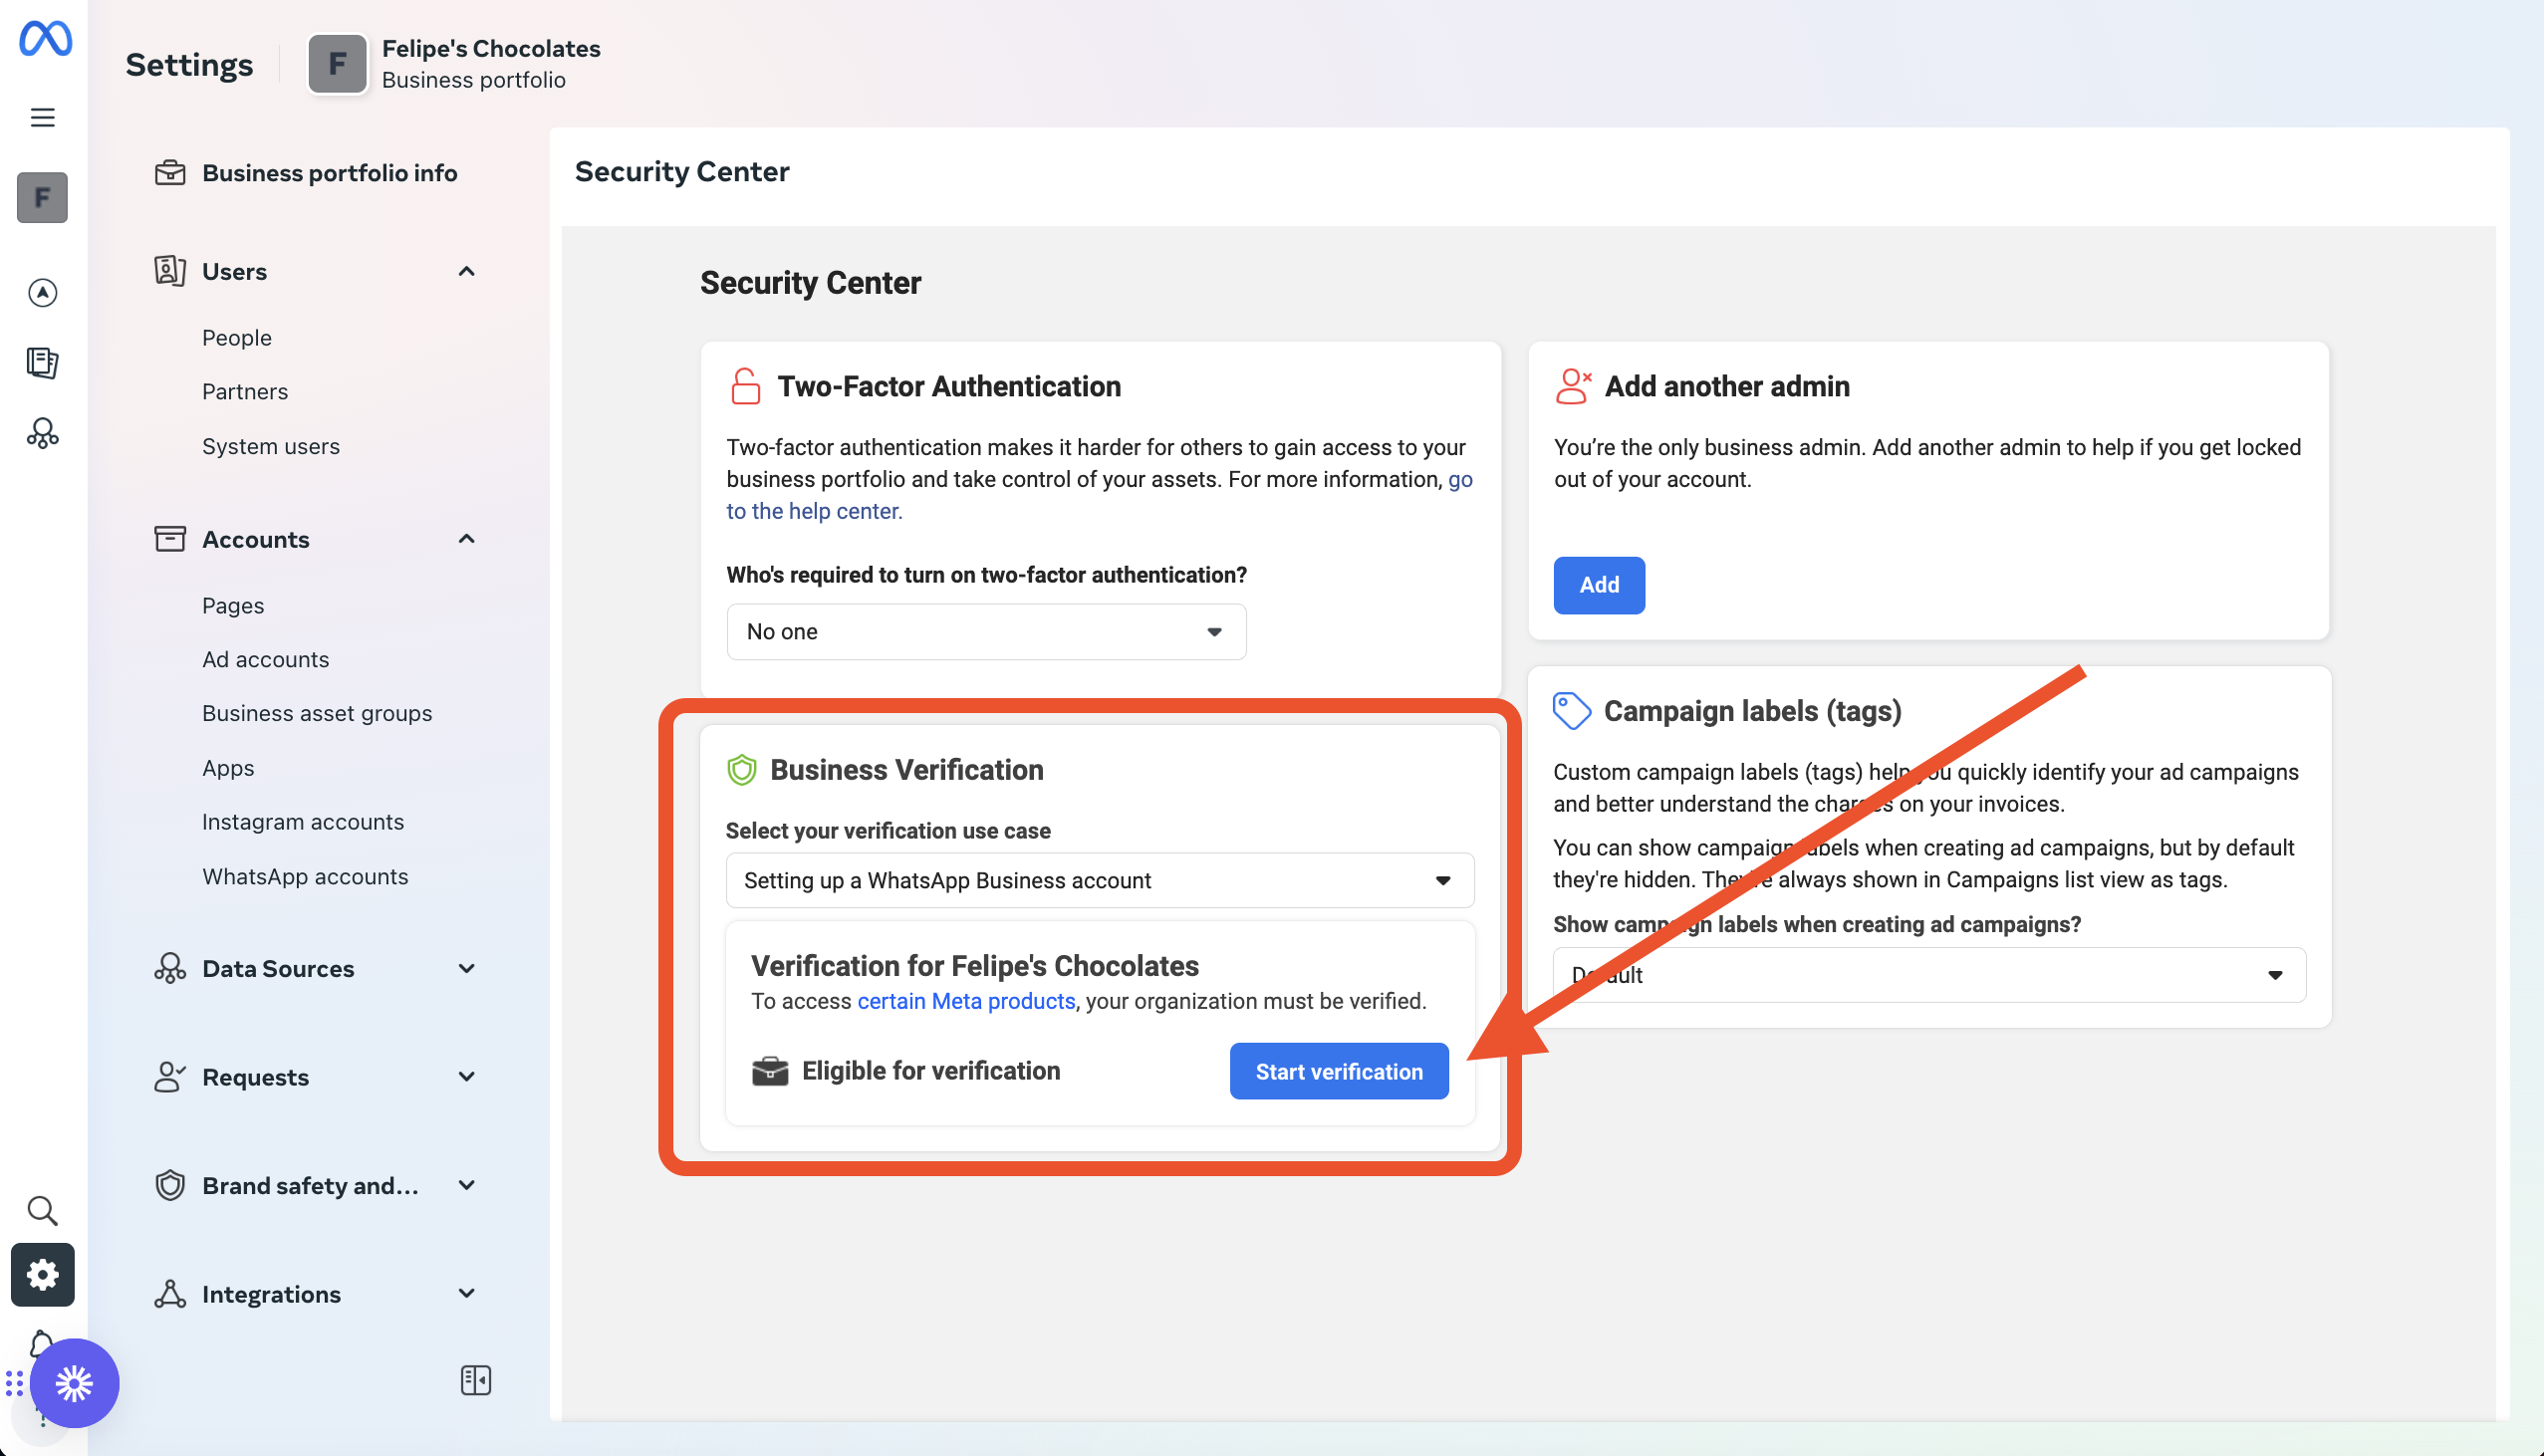
- Verify that your business portfolio is verified. If it is, you will see a green shield in the Business Verification box.
My business is not verified - How can I verify it?
When accessing the security center, you will find the box with your business verification. It’s important to note that there are two possible scenarios. Click on the one that corresponds to your case: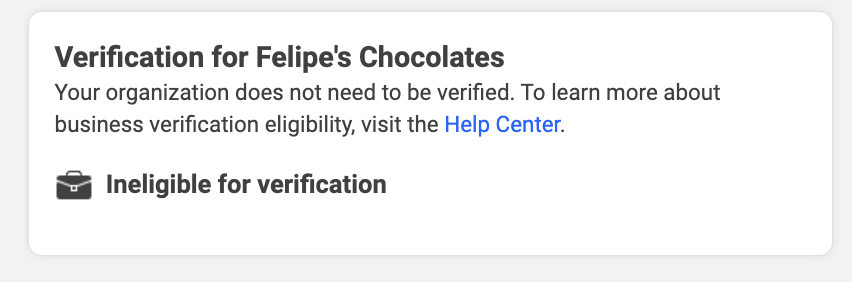
The verification button is disabled
Learn how to enable the verification button.
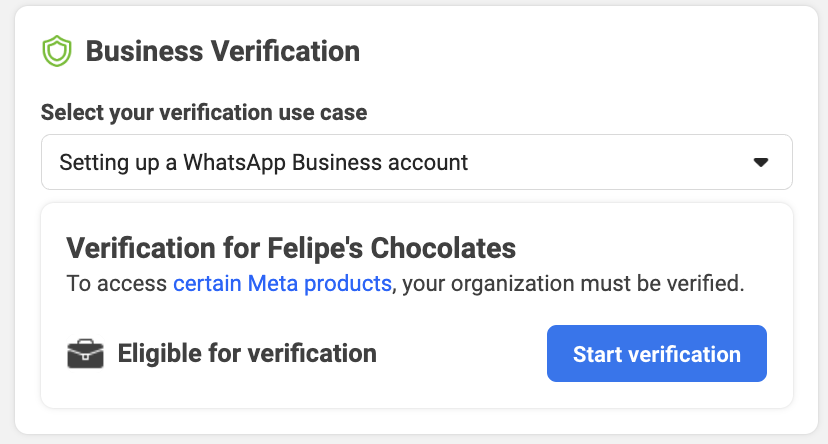
The verification button is enabled
Continue with the verification process.
The button in the Security Center is disabled - How can I enable it?
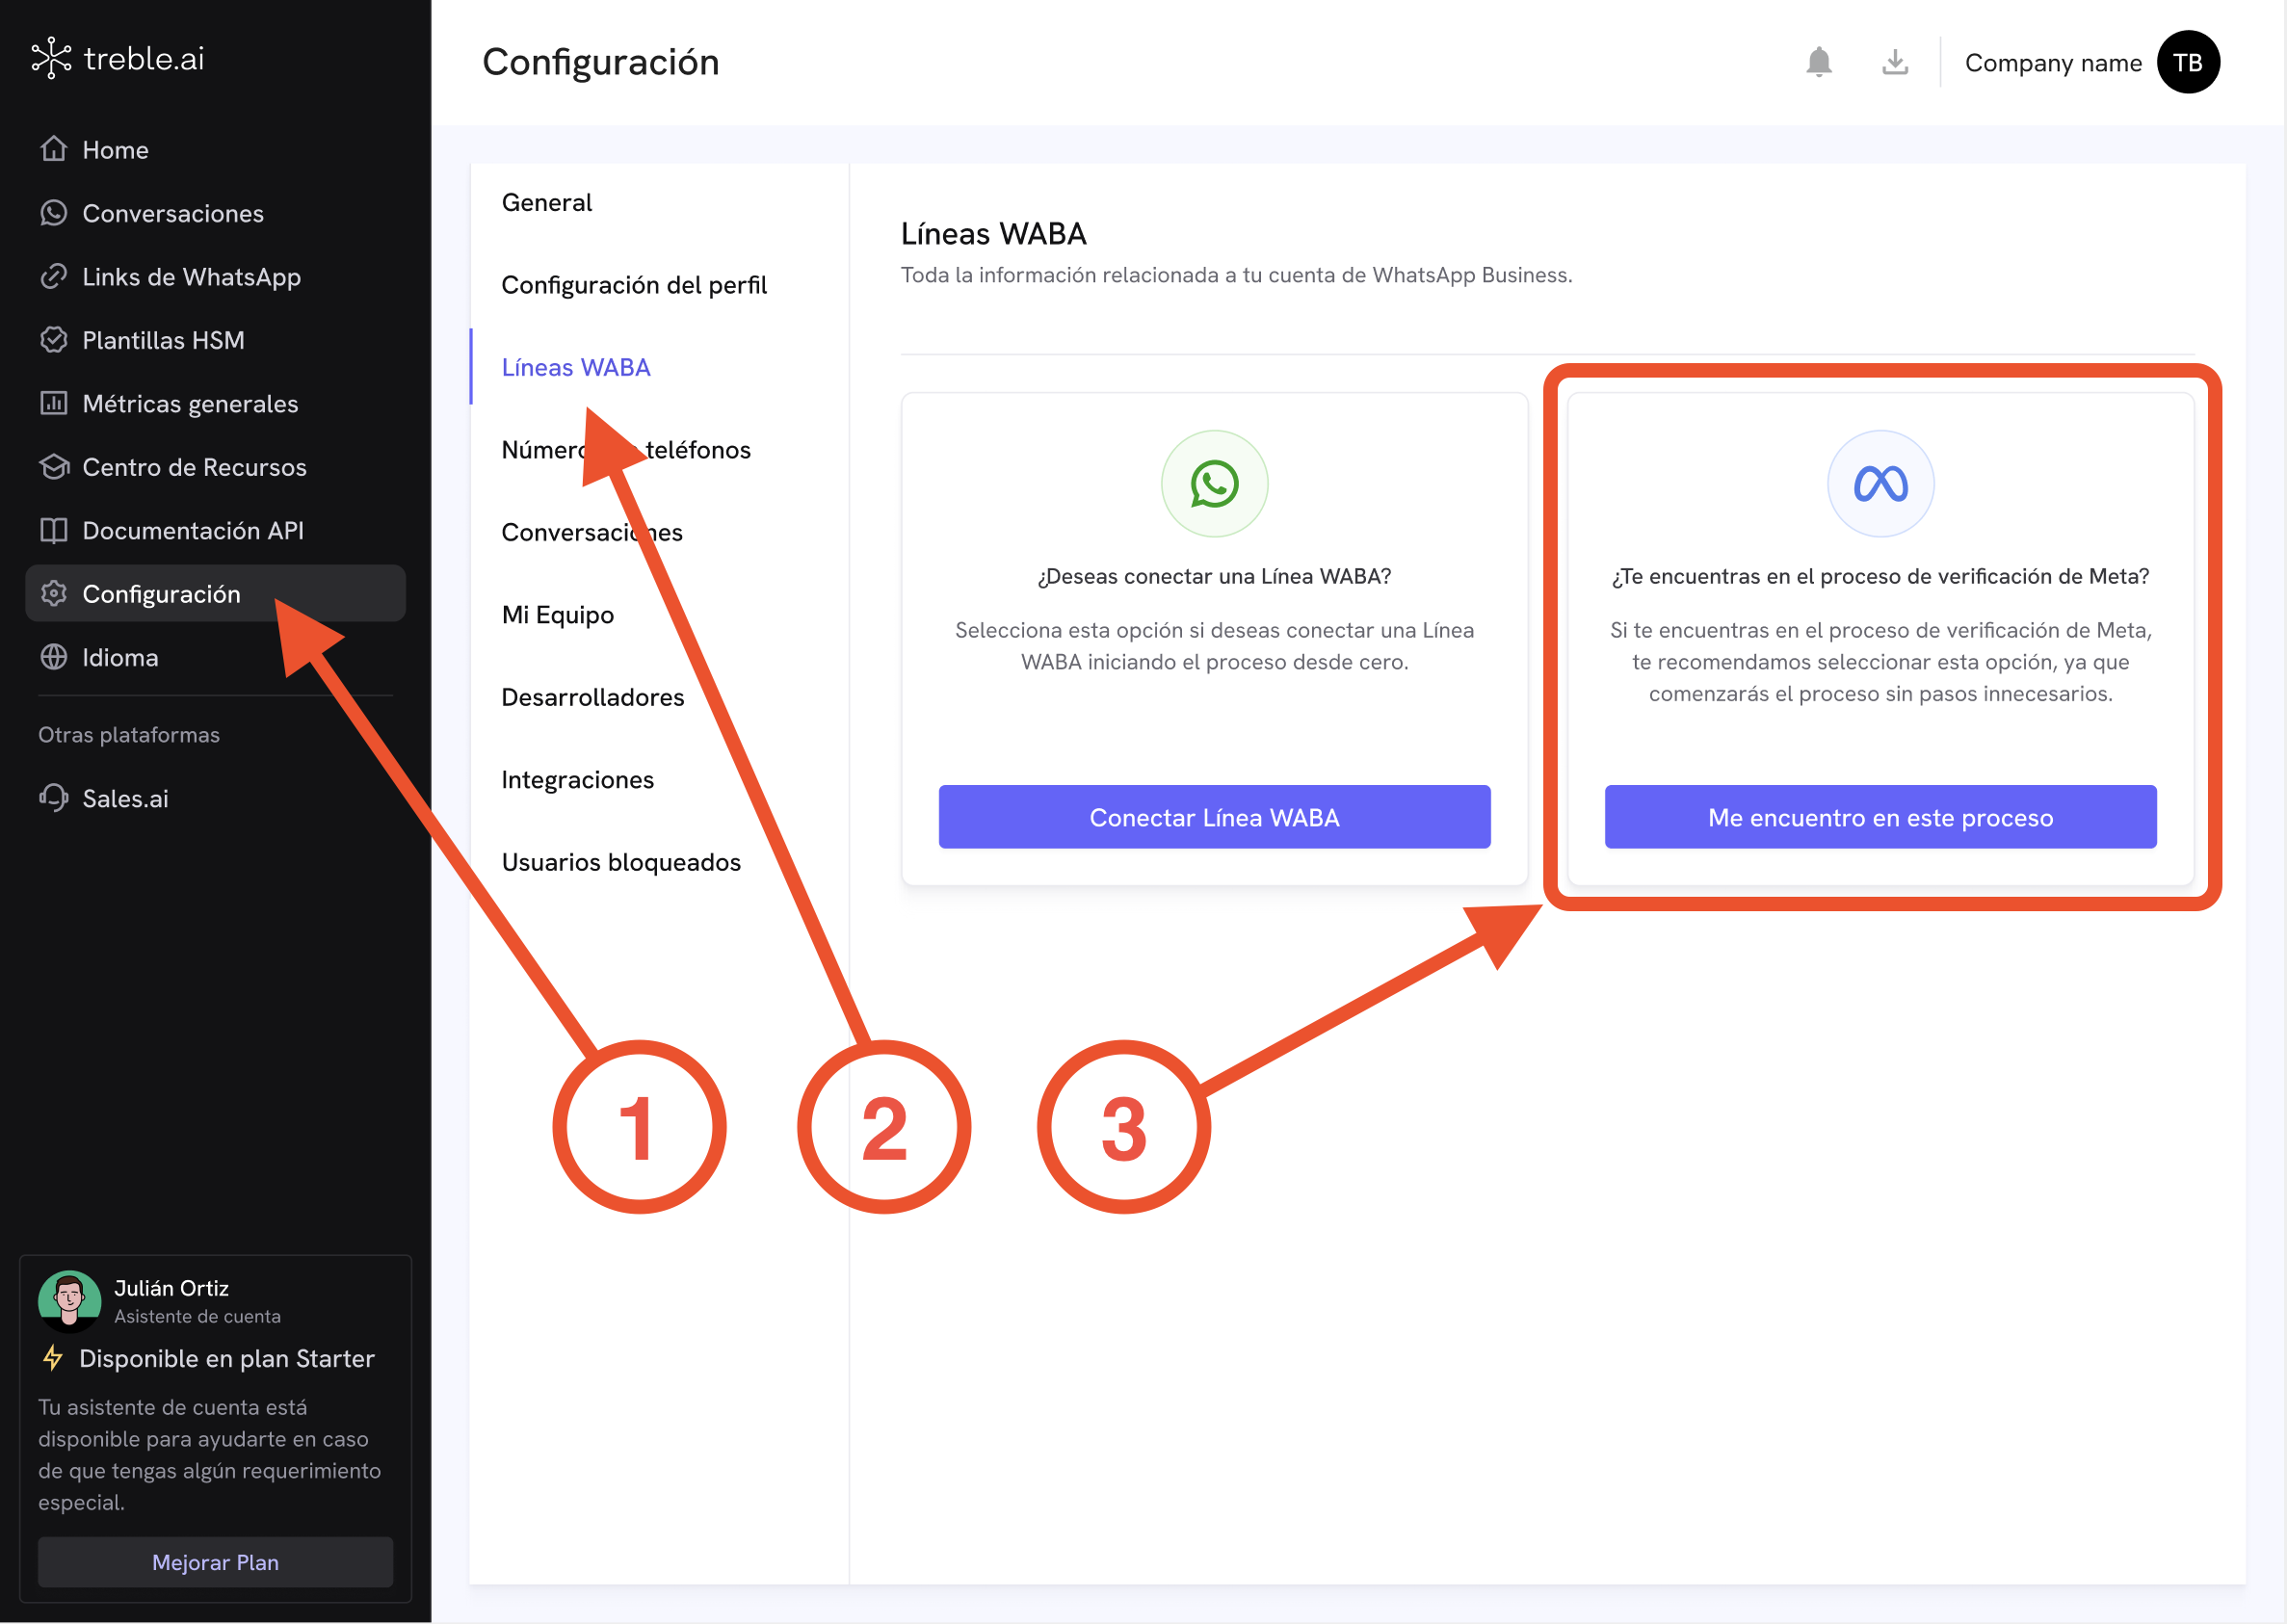
If the verification button is disabled, follow this process to enable it:- Access Treble.ai enter the Treble.ai platform via the following URL:
- Click on Settings in the left menu
- Click on WABA Lines
- Click on the button I am in this process: Choose the option on the right to continue with the verification process.
Form Steps
1
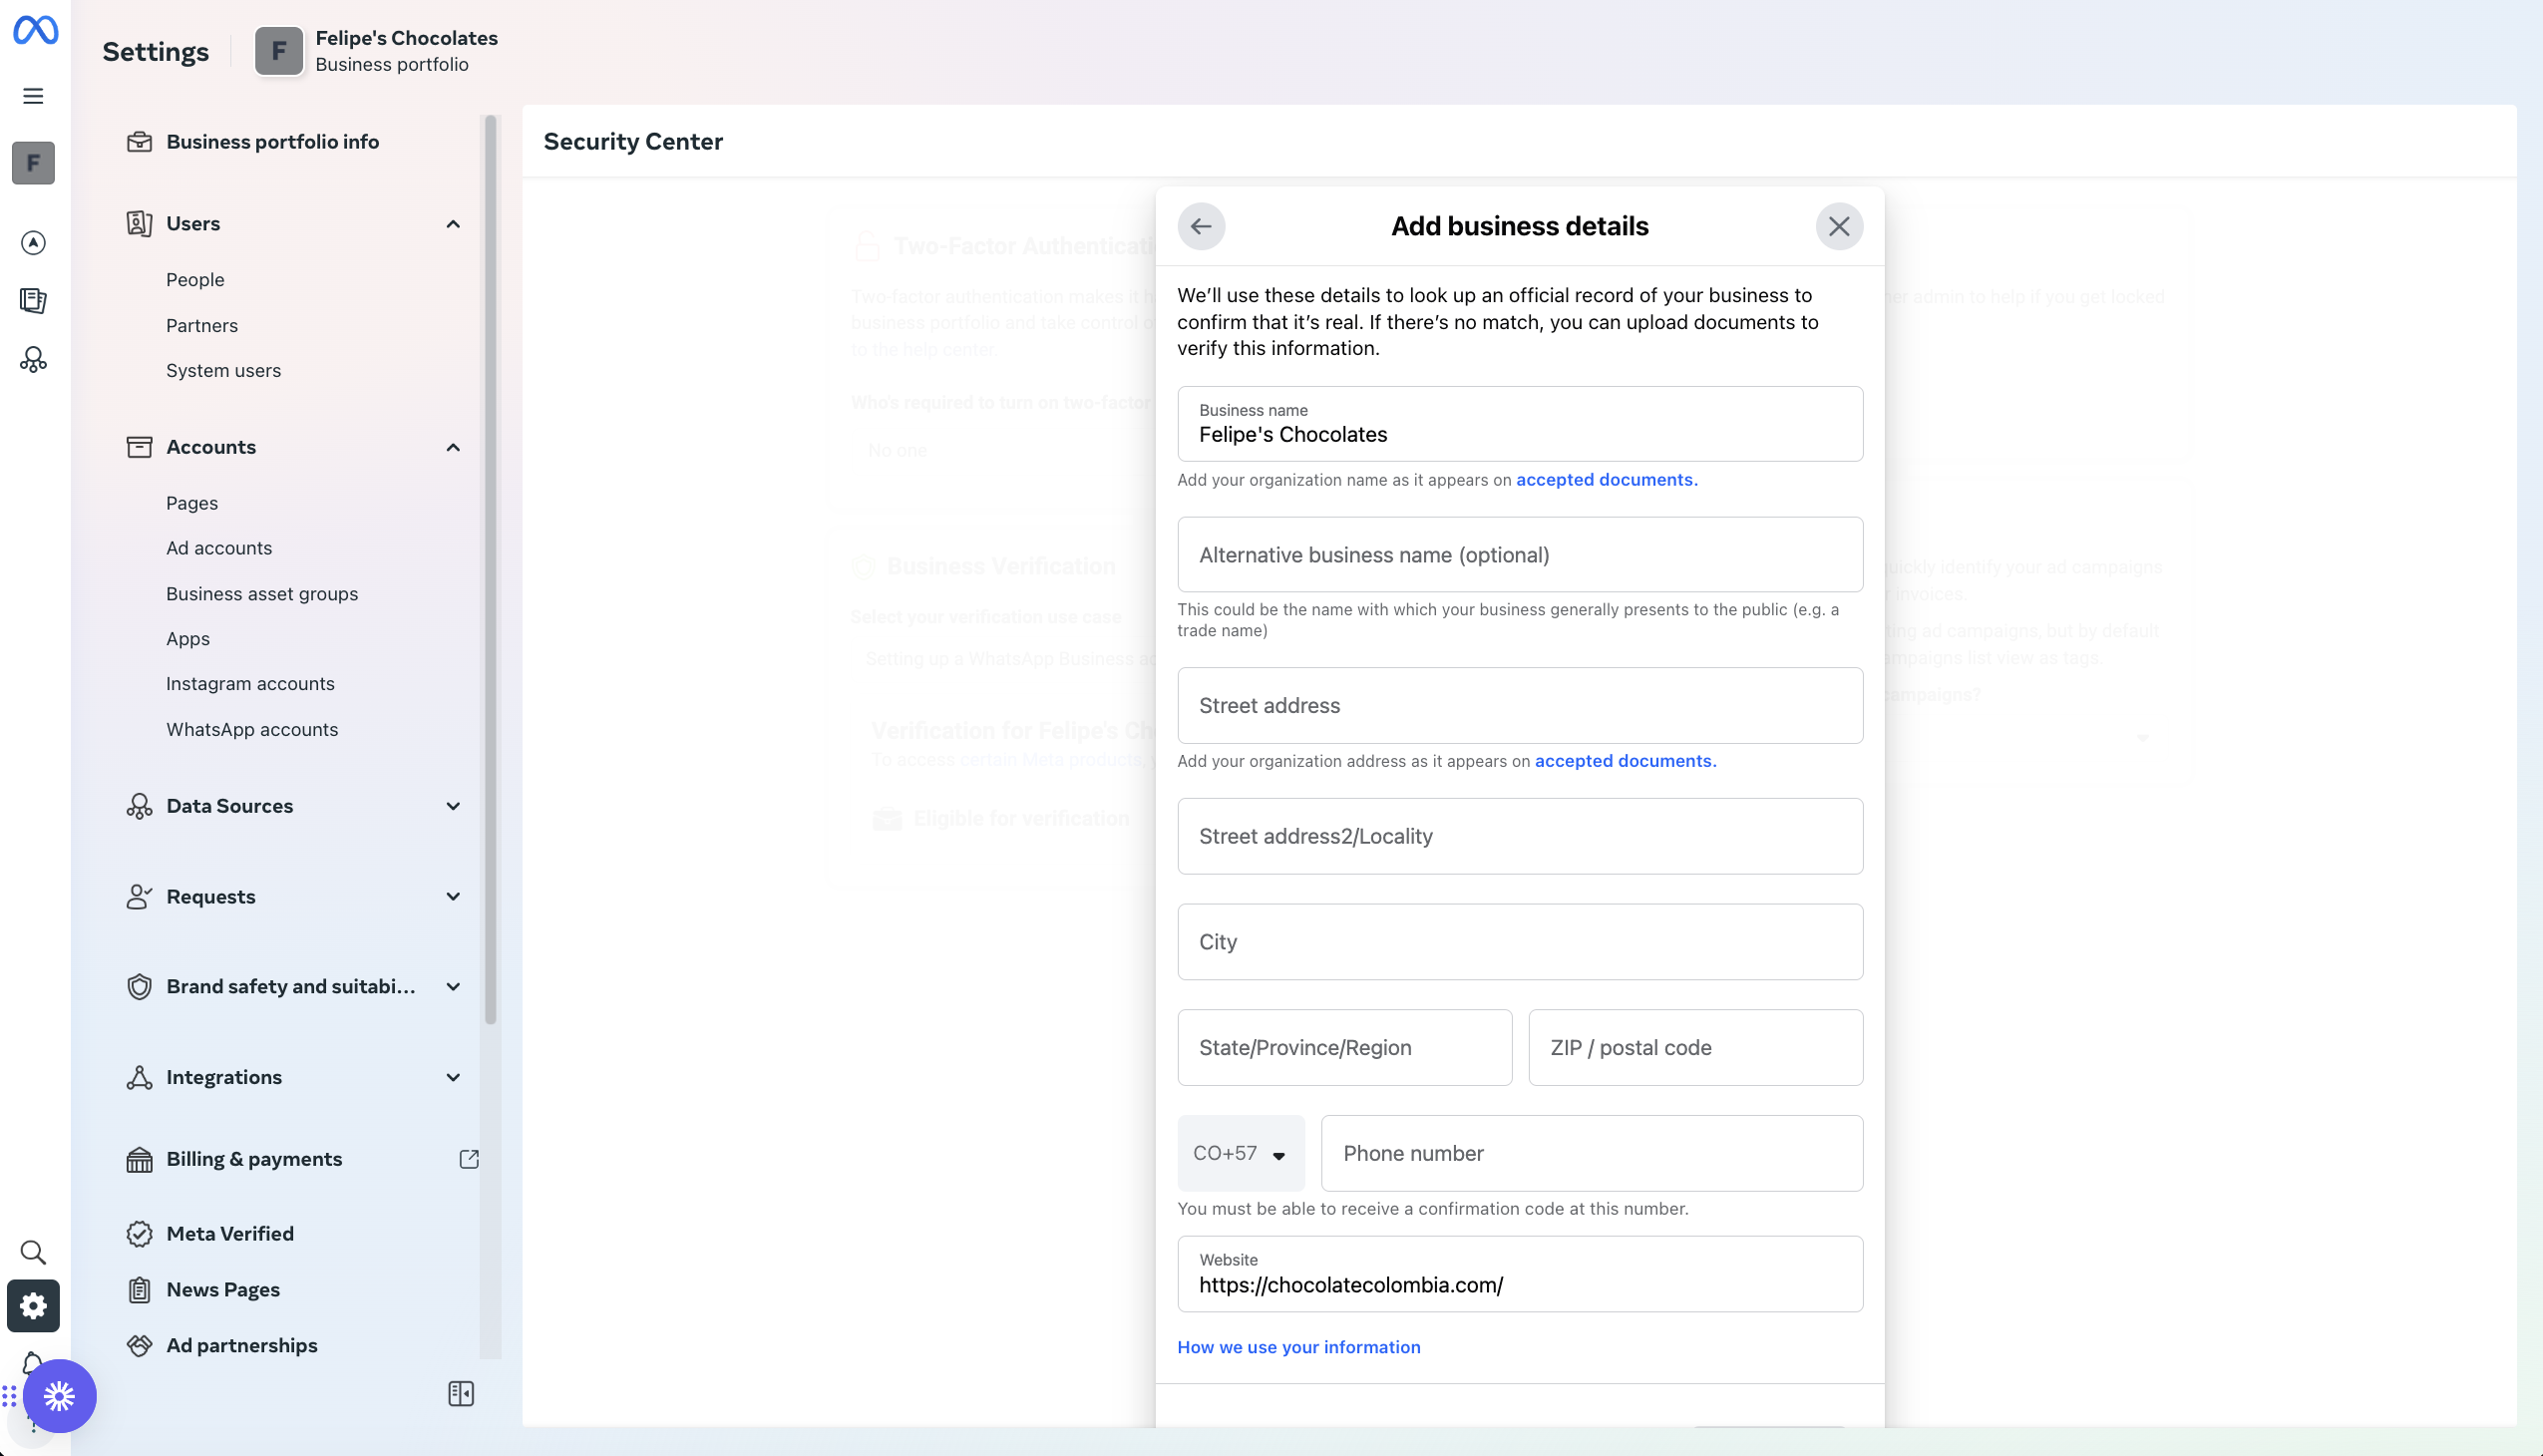
Add business information
Add your business information in the corresponding fields. You will need to fill in information such as your business name, website address, and country.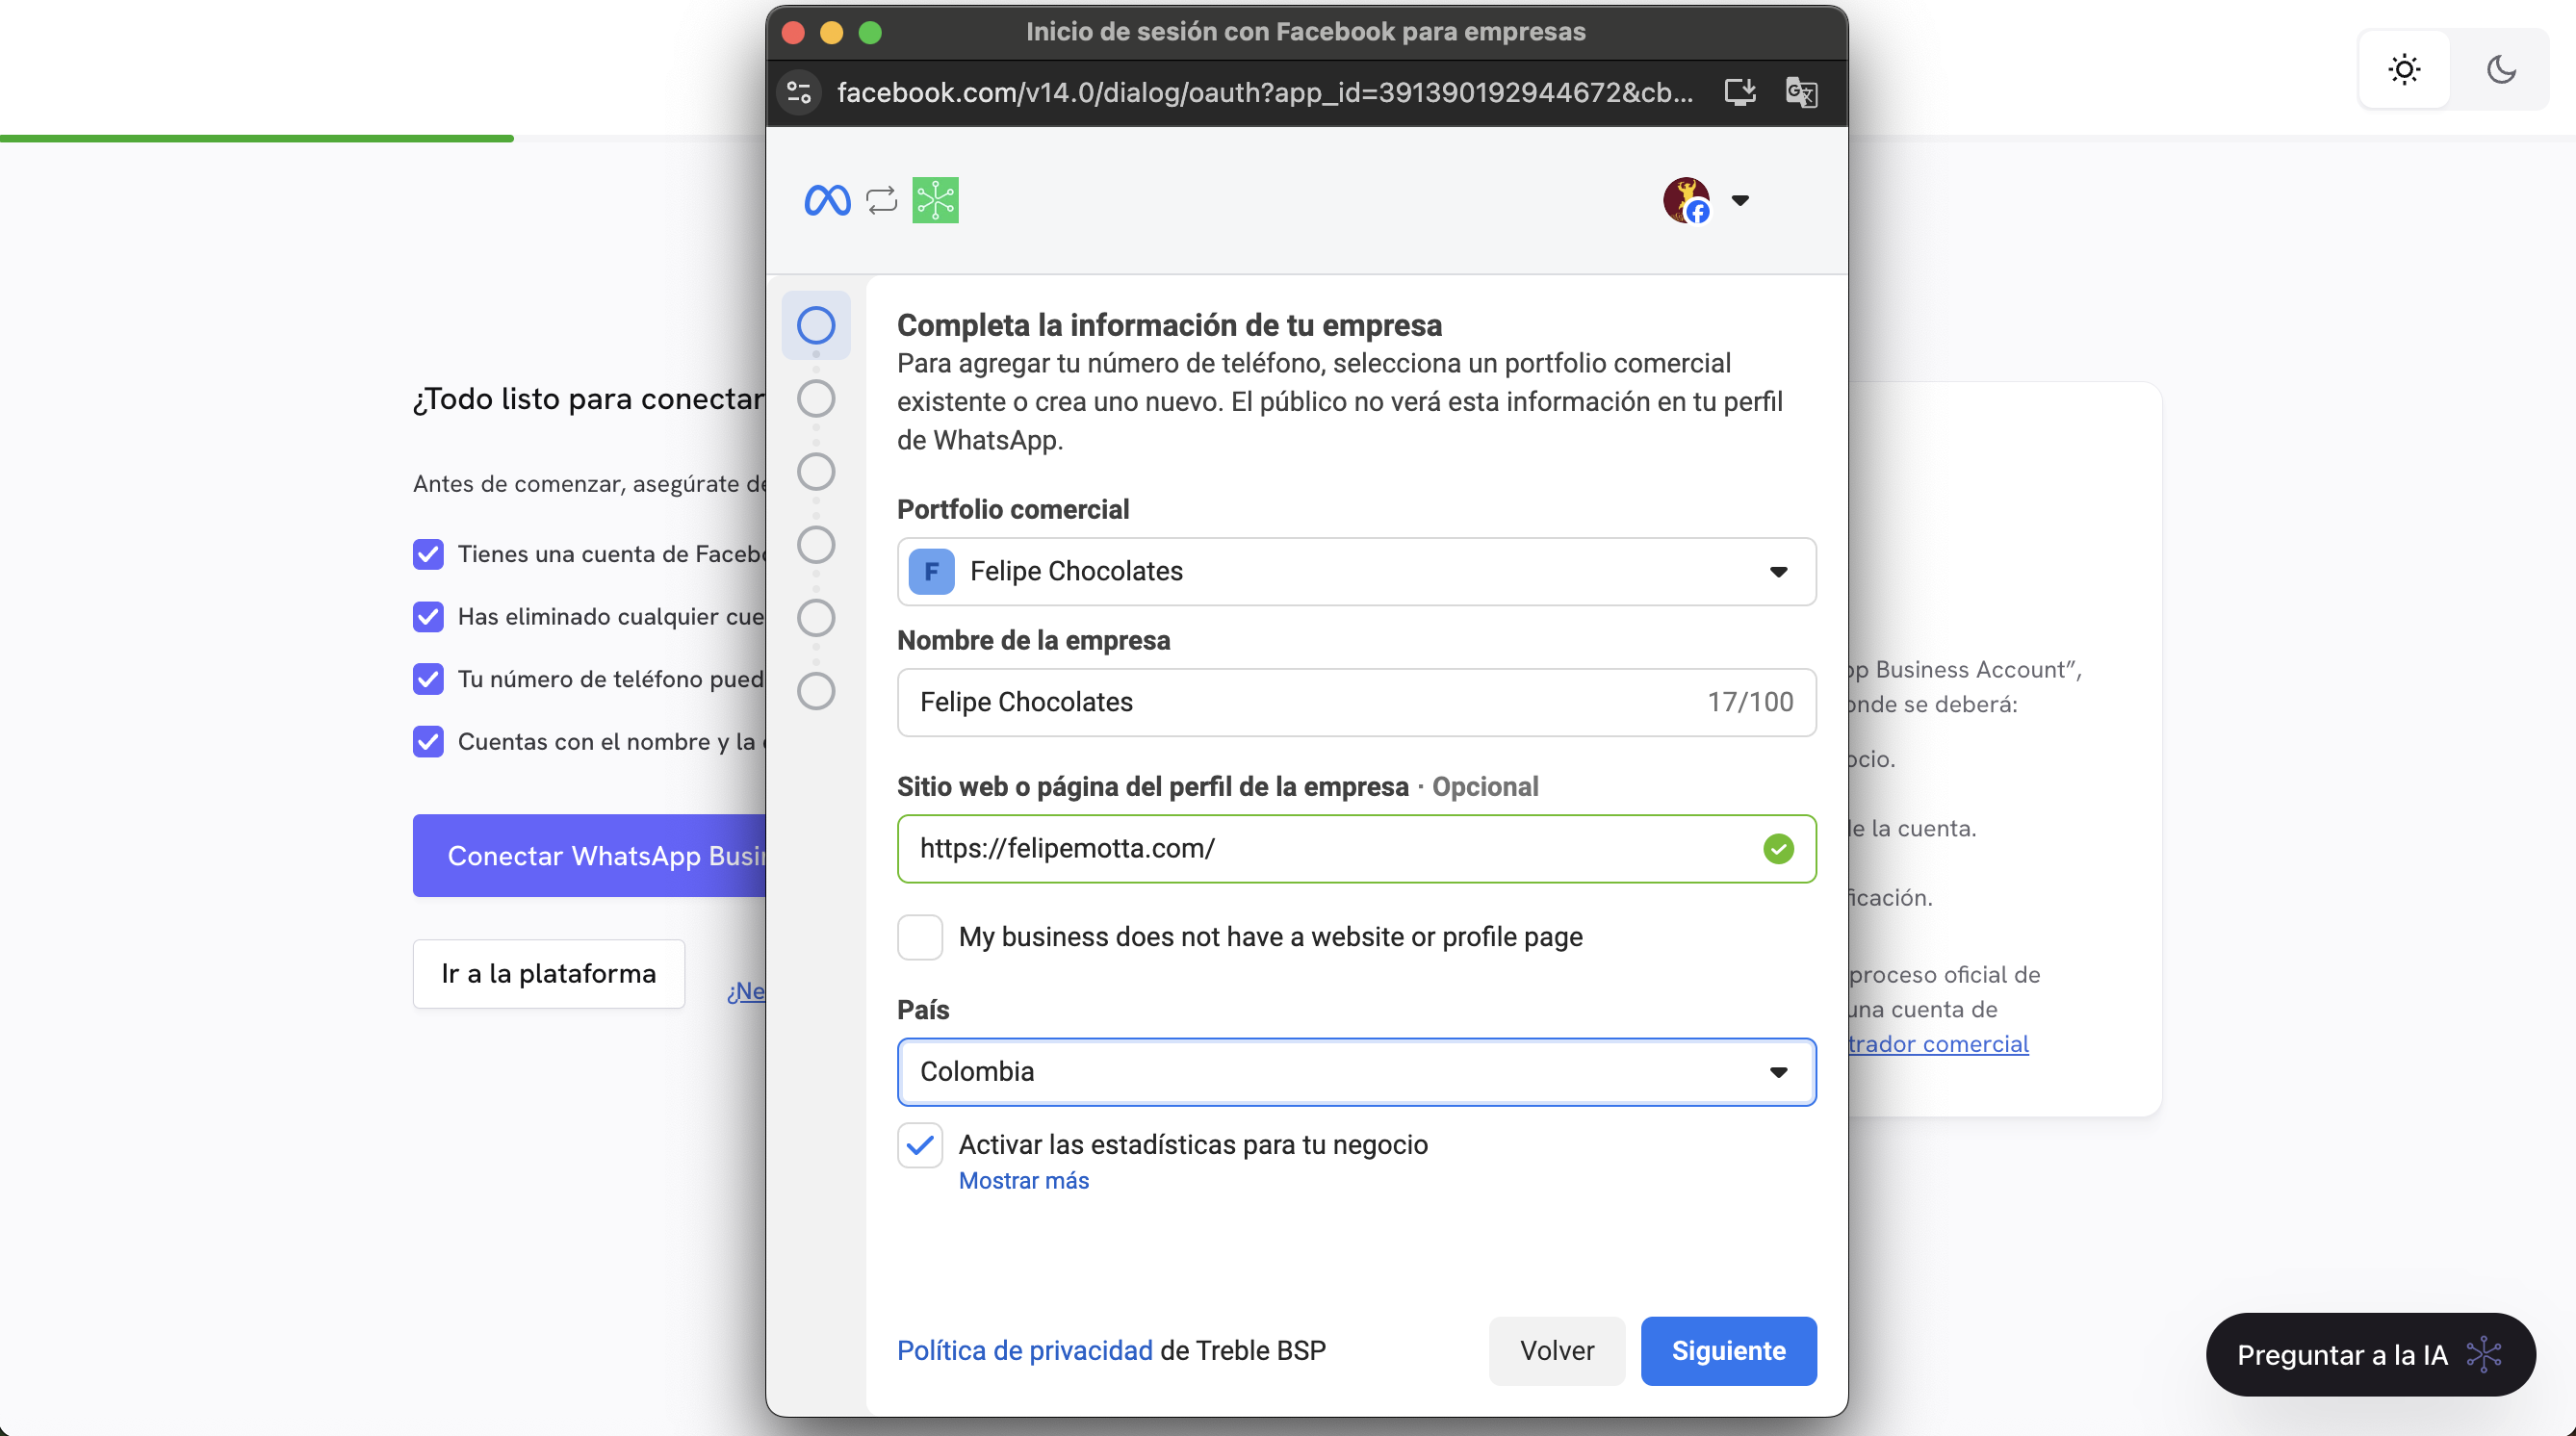
2
Create WhatsApp accounts
Leave the default option that appears in both WhatsApp fields.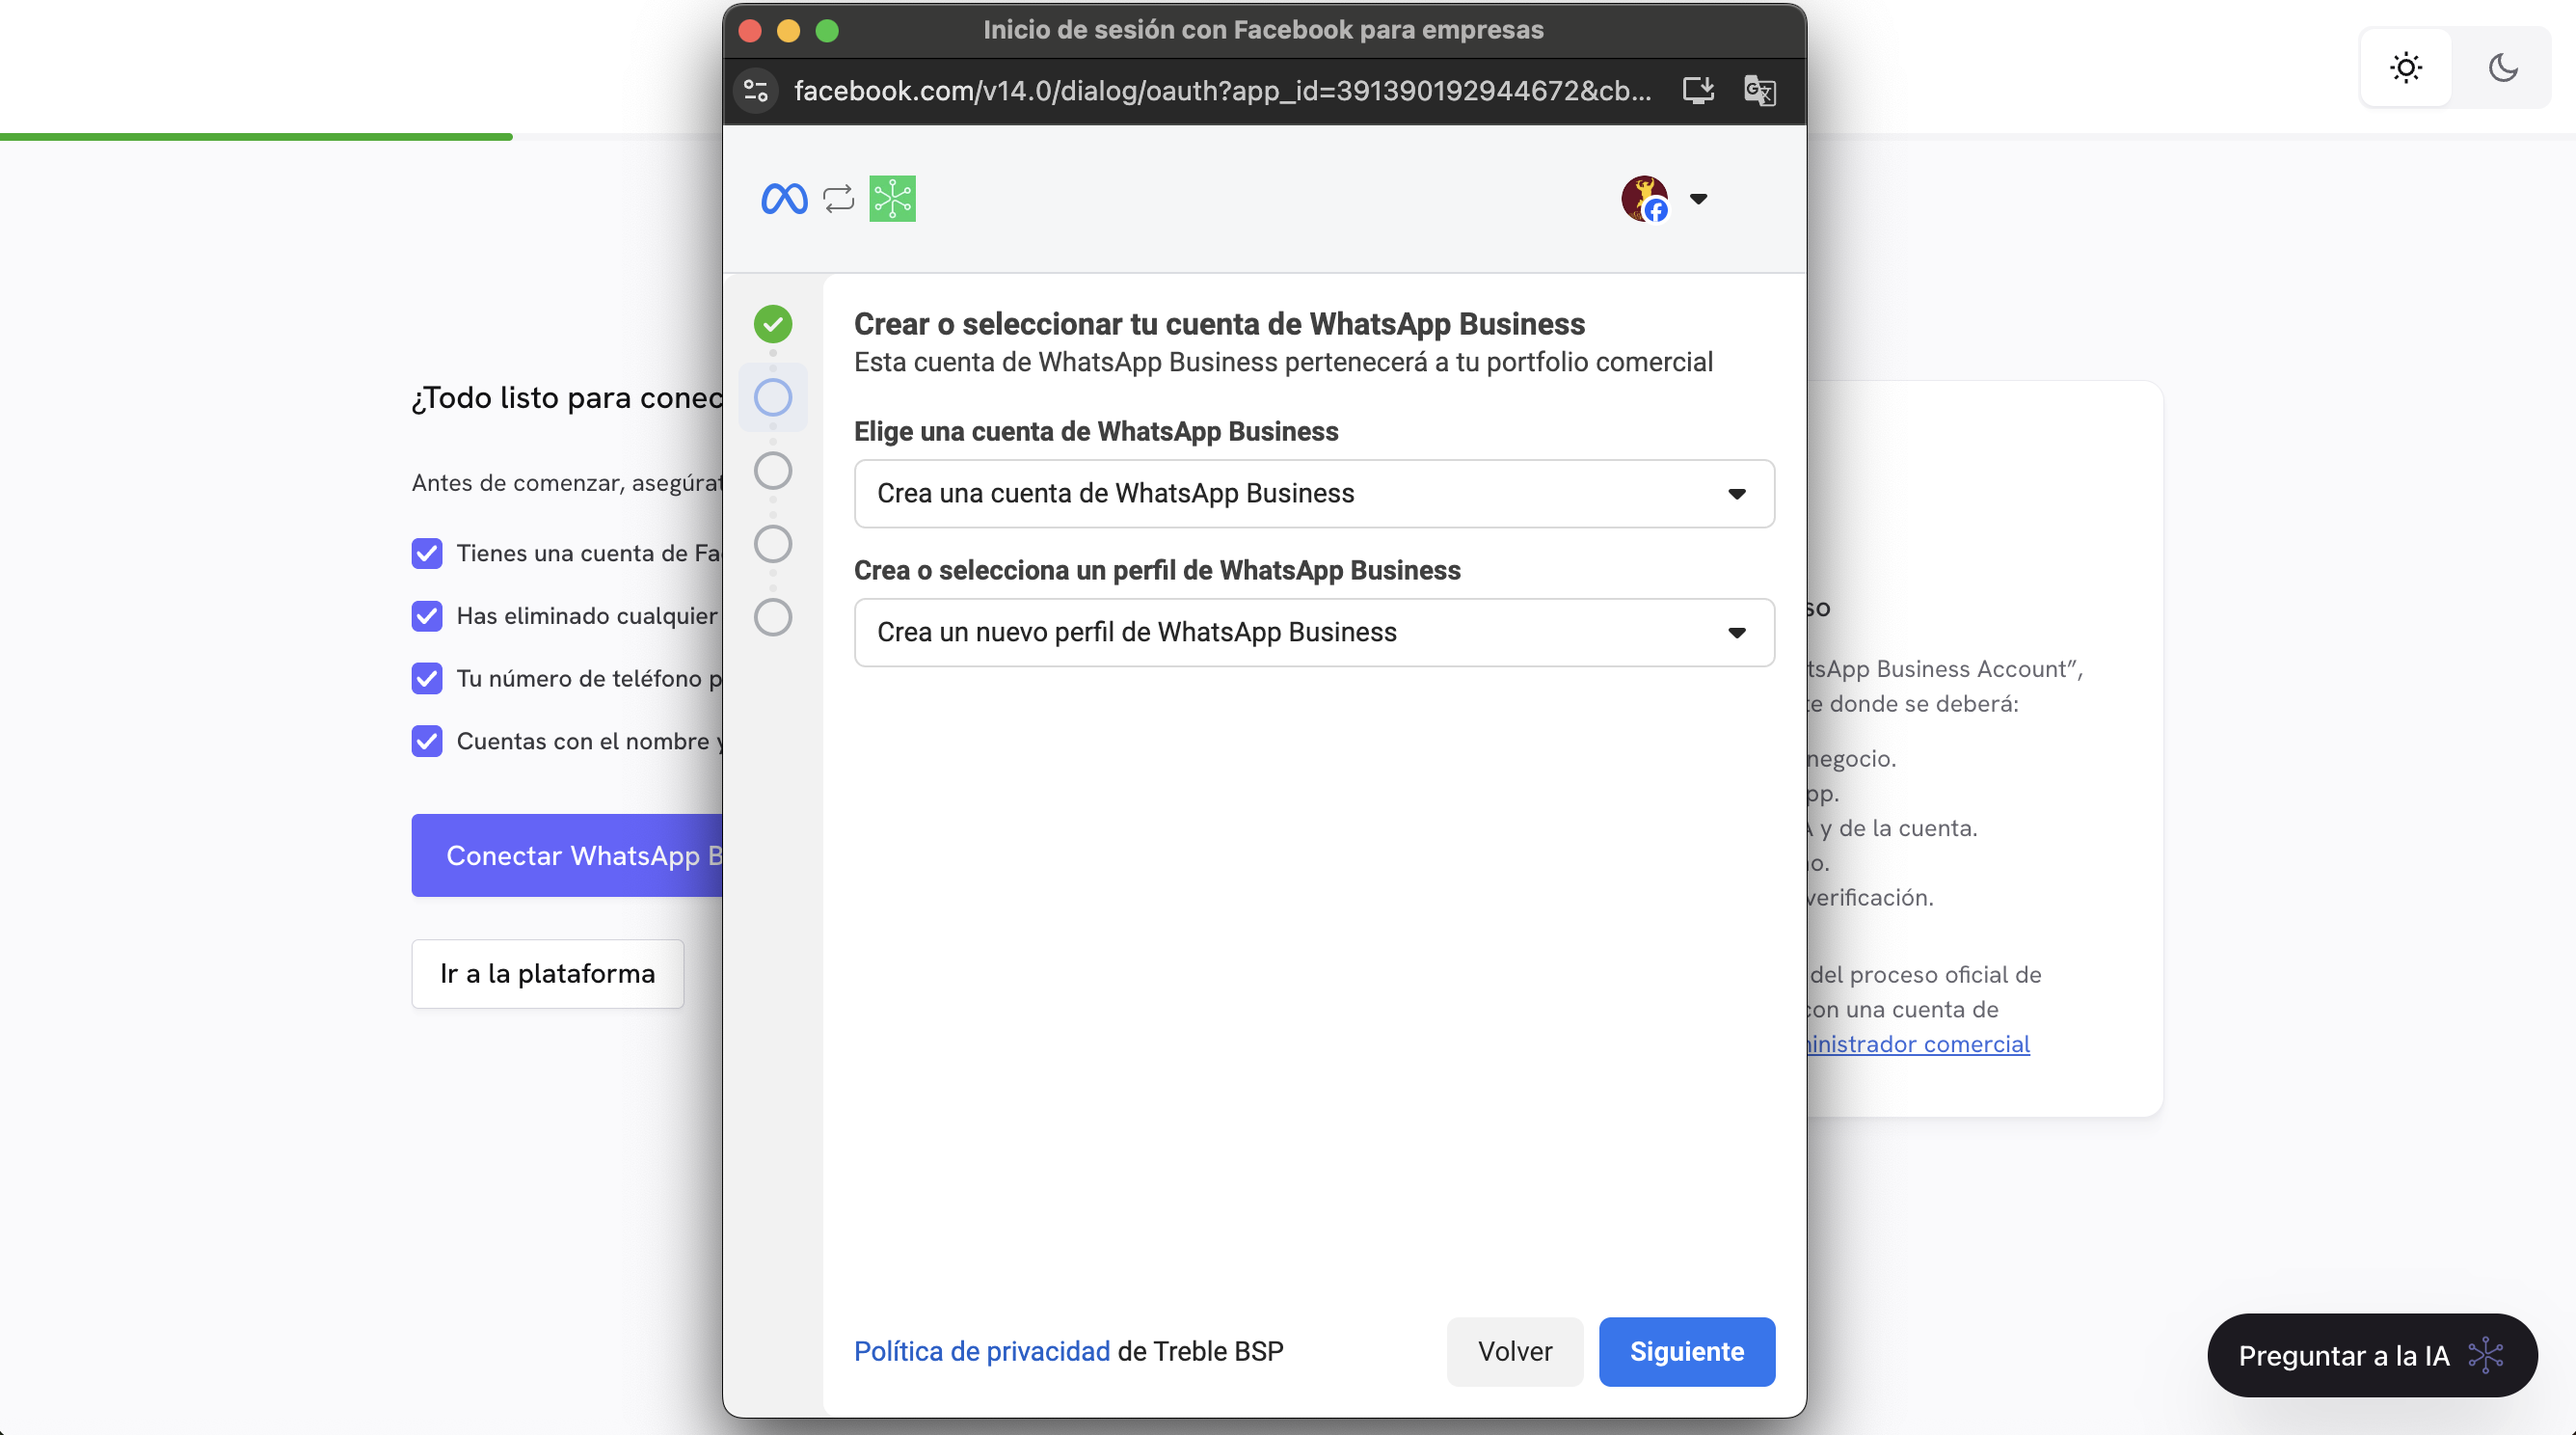
3
Name of your WABA and account display
In this section, you will find three fields: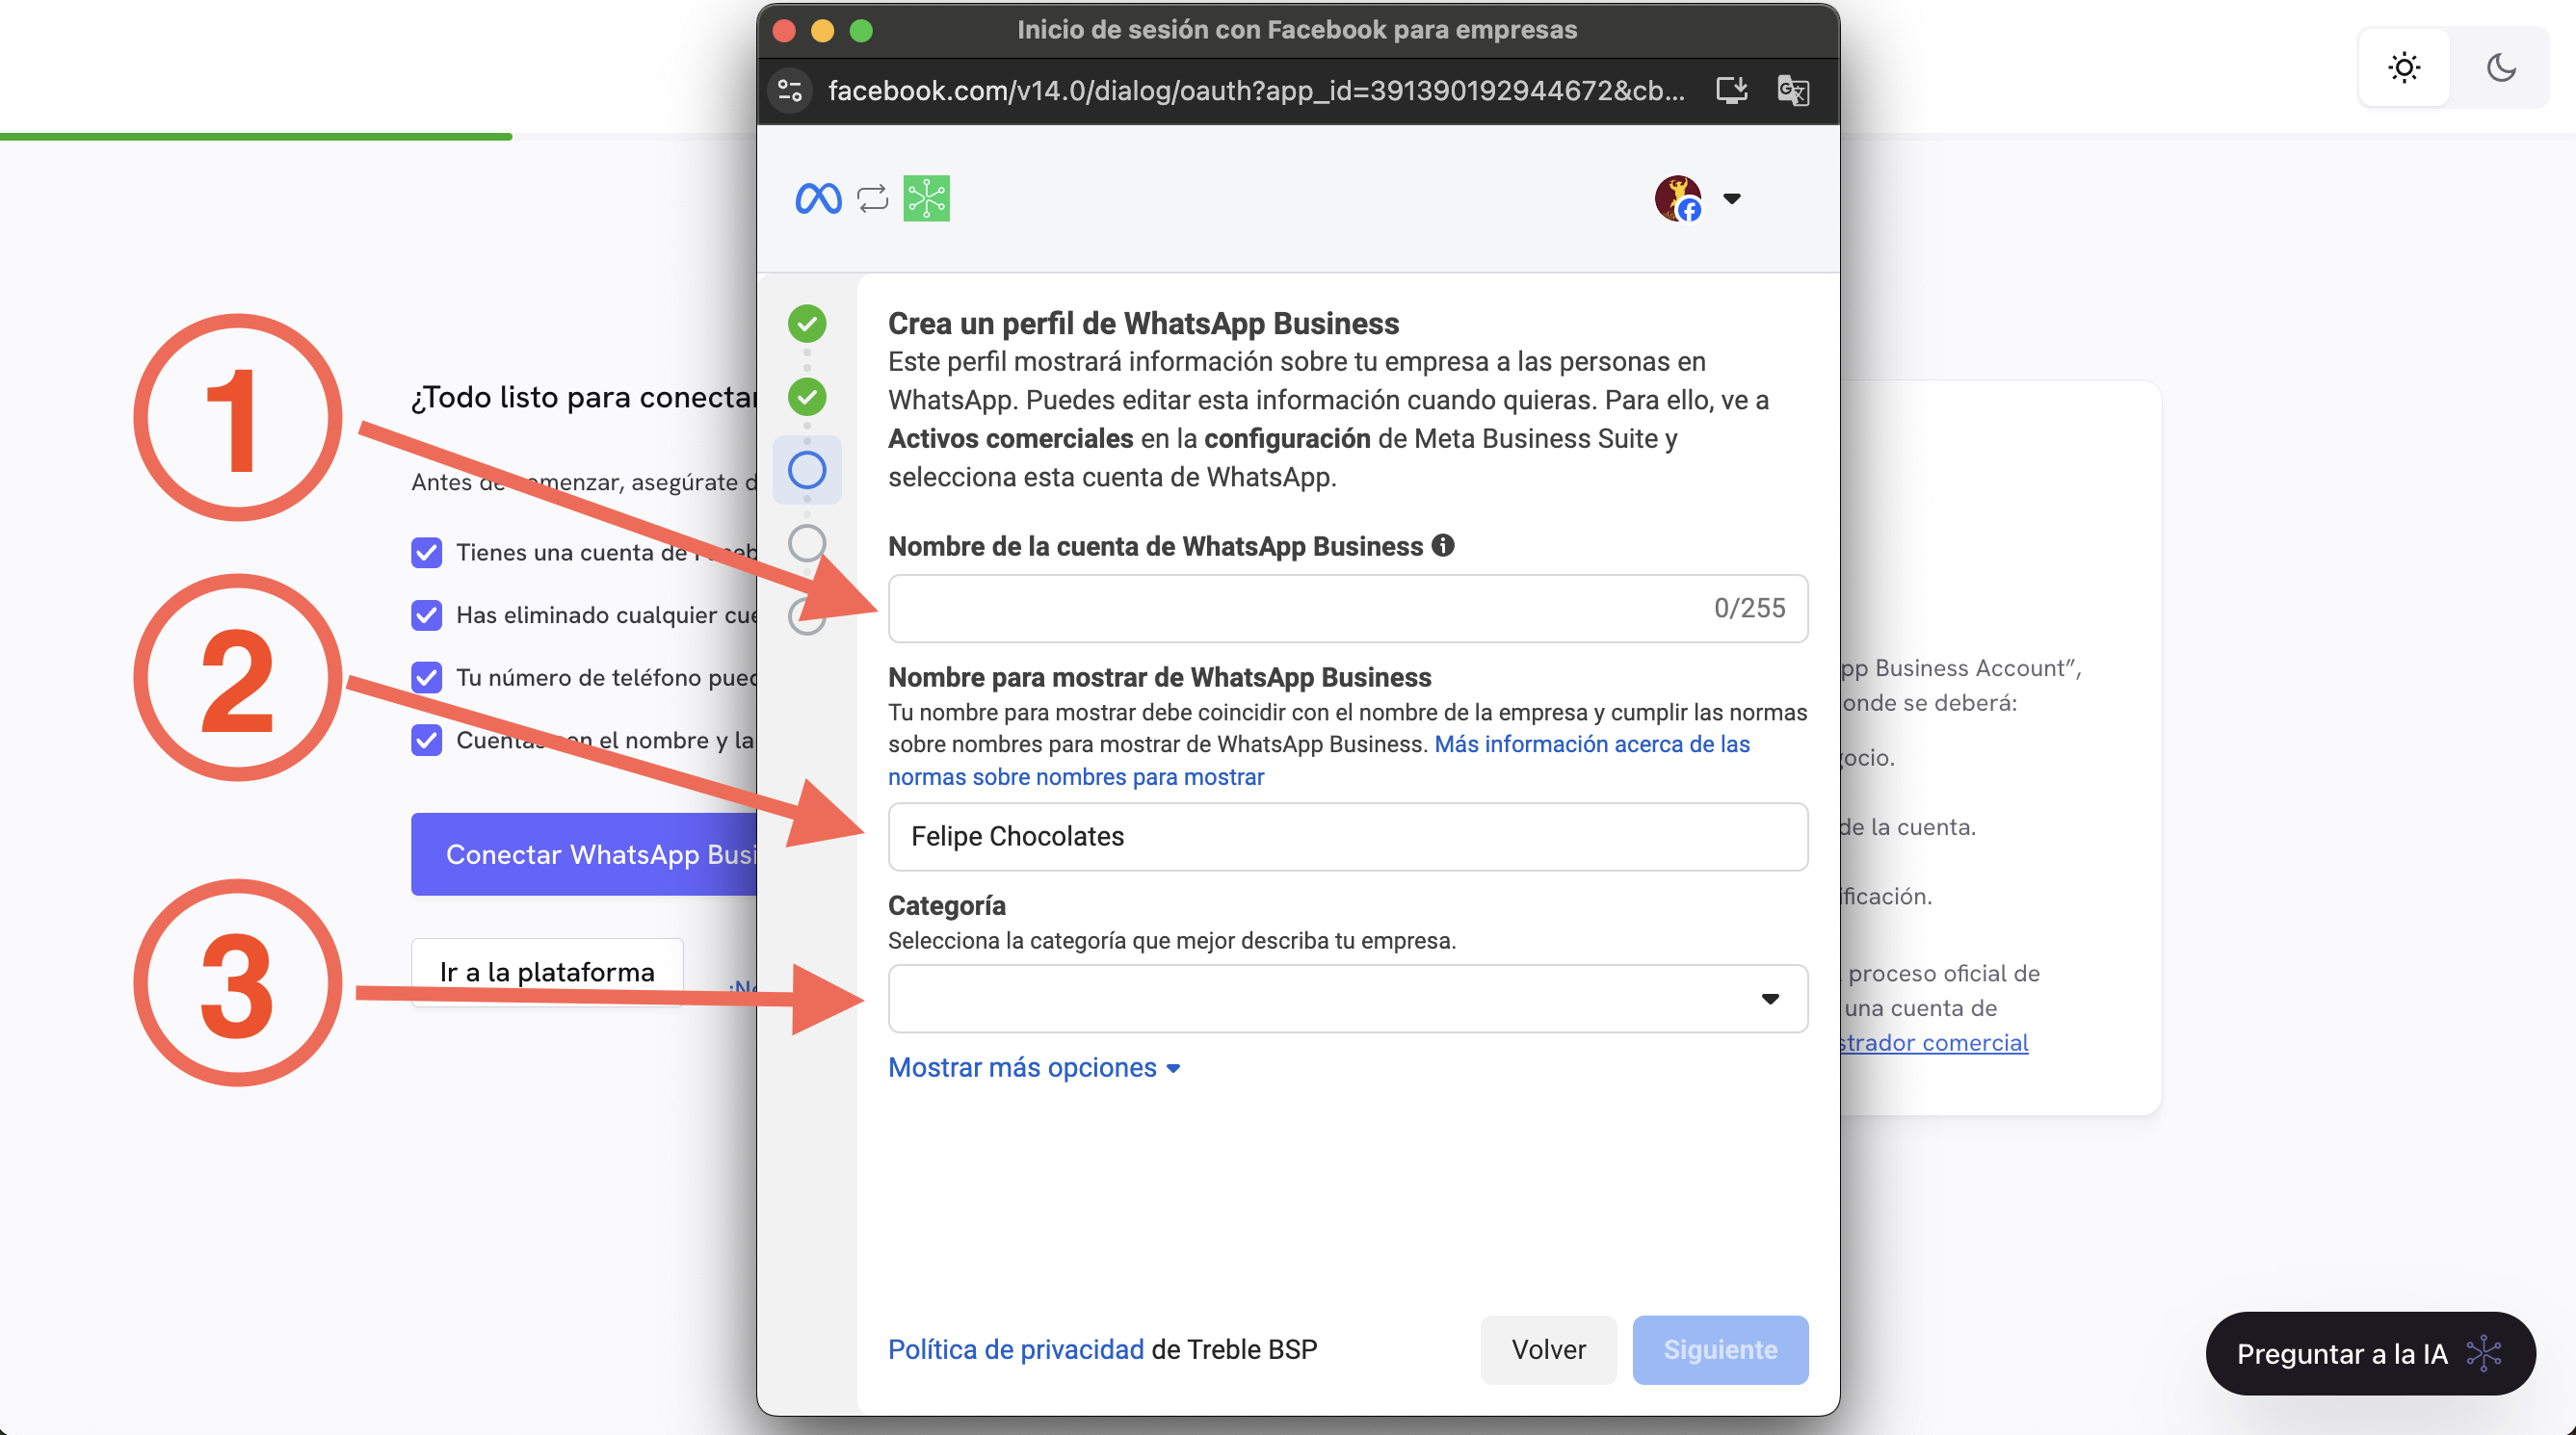
- WhatsApp Business Account Name: This is the internal name that will identify your WhatsApp Business account. This name will not be visible in the WhatsApp chat. We recommend using your business name followed by the word “Treble”. Example: “Felipe’s Chocolates - Treble”.
- Display name in WhatsApp chat: This is the name that will be visible in the WhatsApp chat. We recommend using your business name. Example: “Felipe’s Chocolates”.
- Business category: Choose your business category. If you can’t find the category you’re looking for, you can select “Professional Services”.
4
Add phone number
If the form asks you to add a phone number, STOP HERE ✋🛑. Having completed the previous steps, you can now return to Meta Business Manager and verify your account.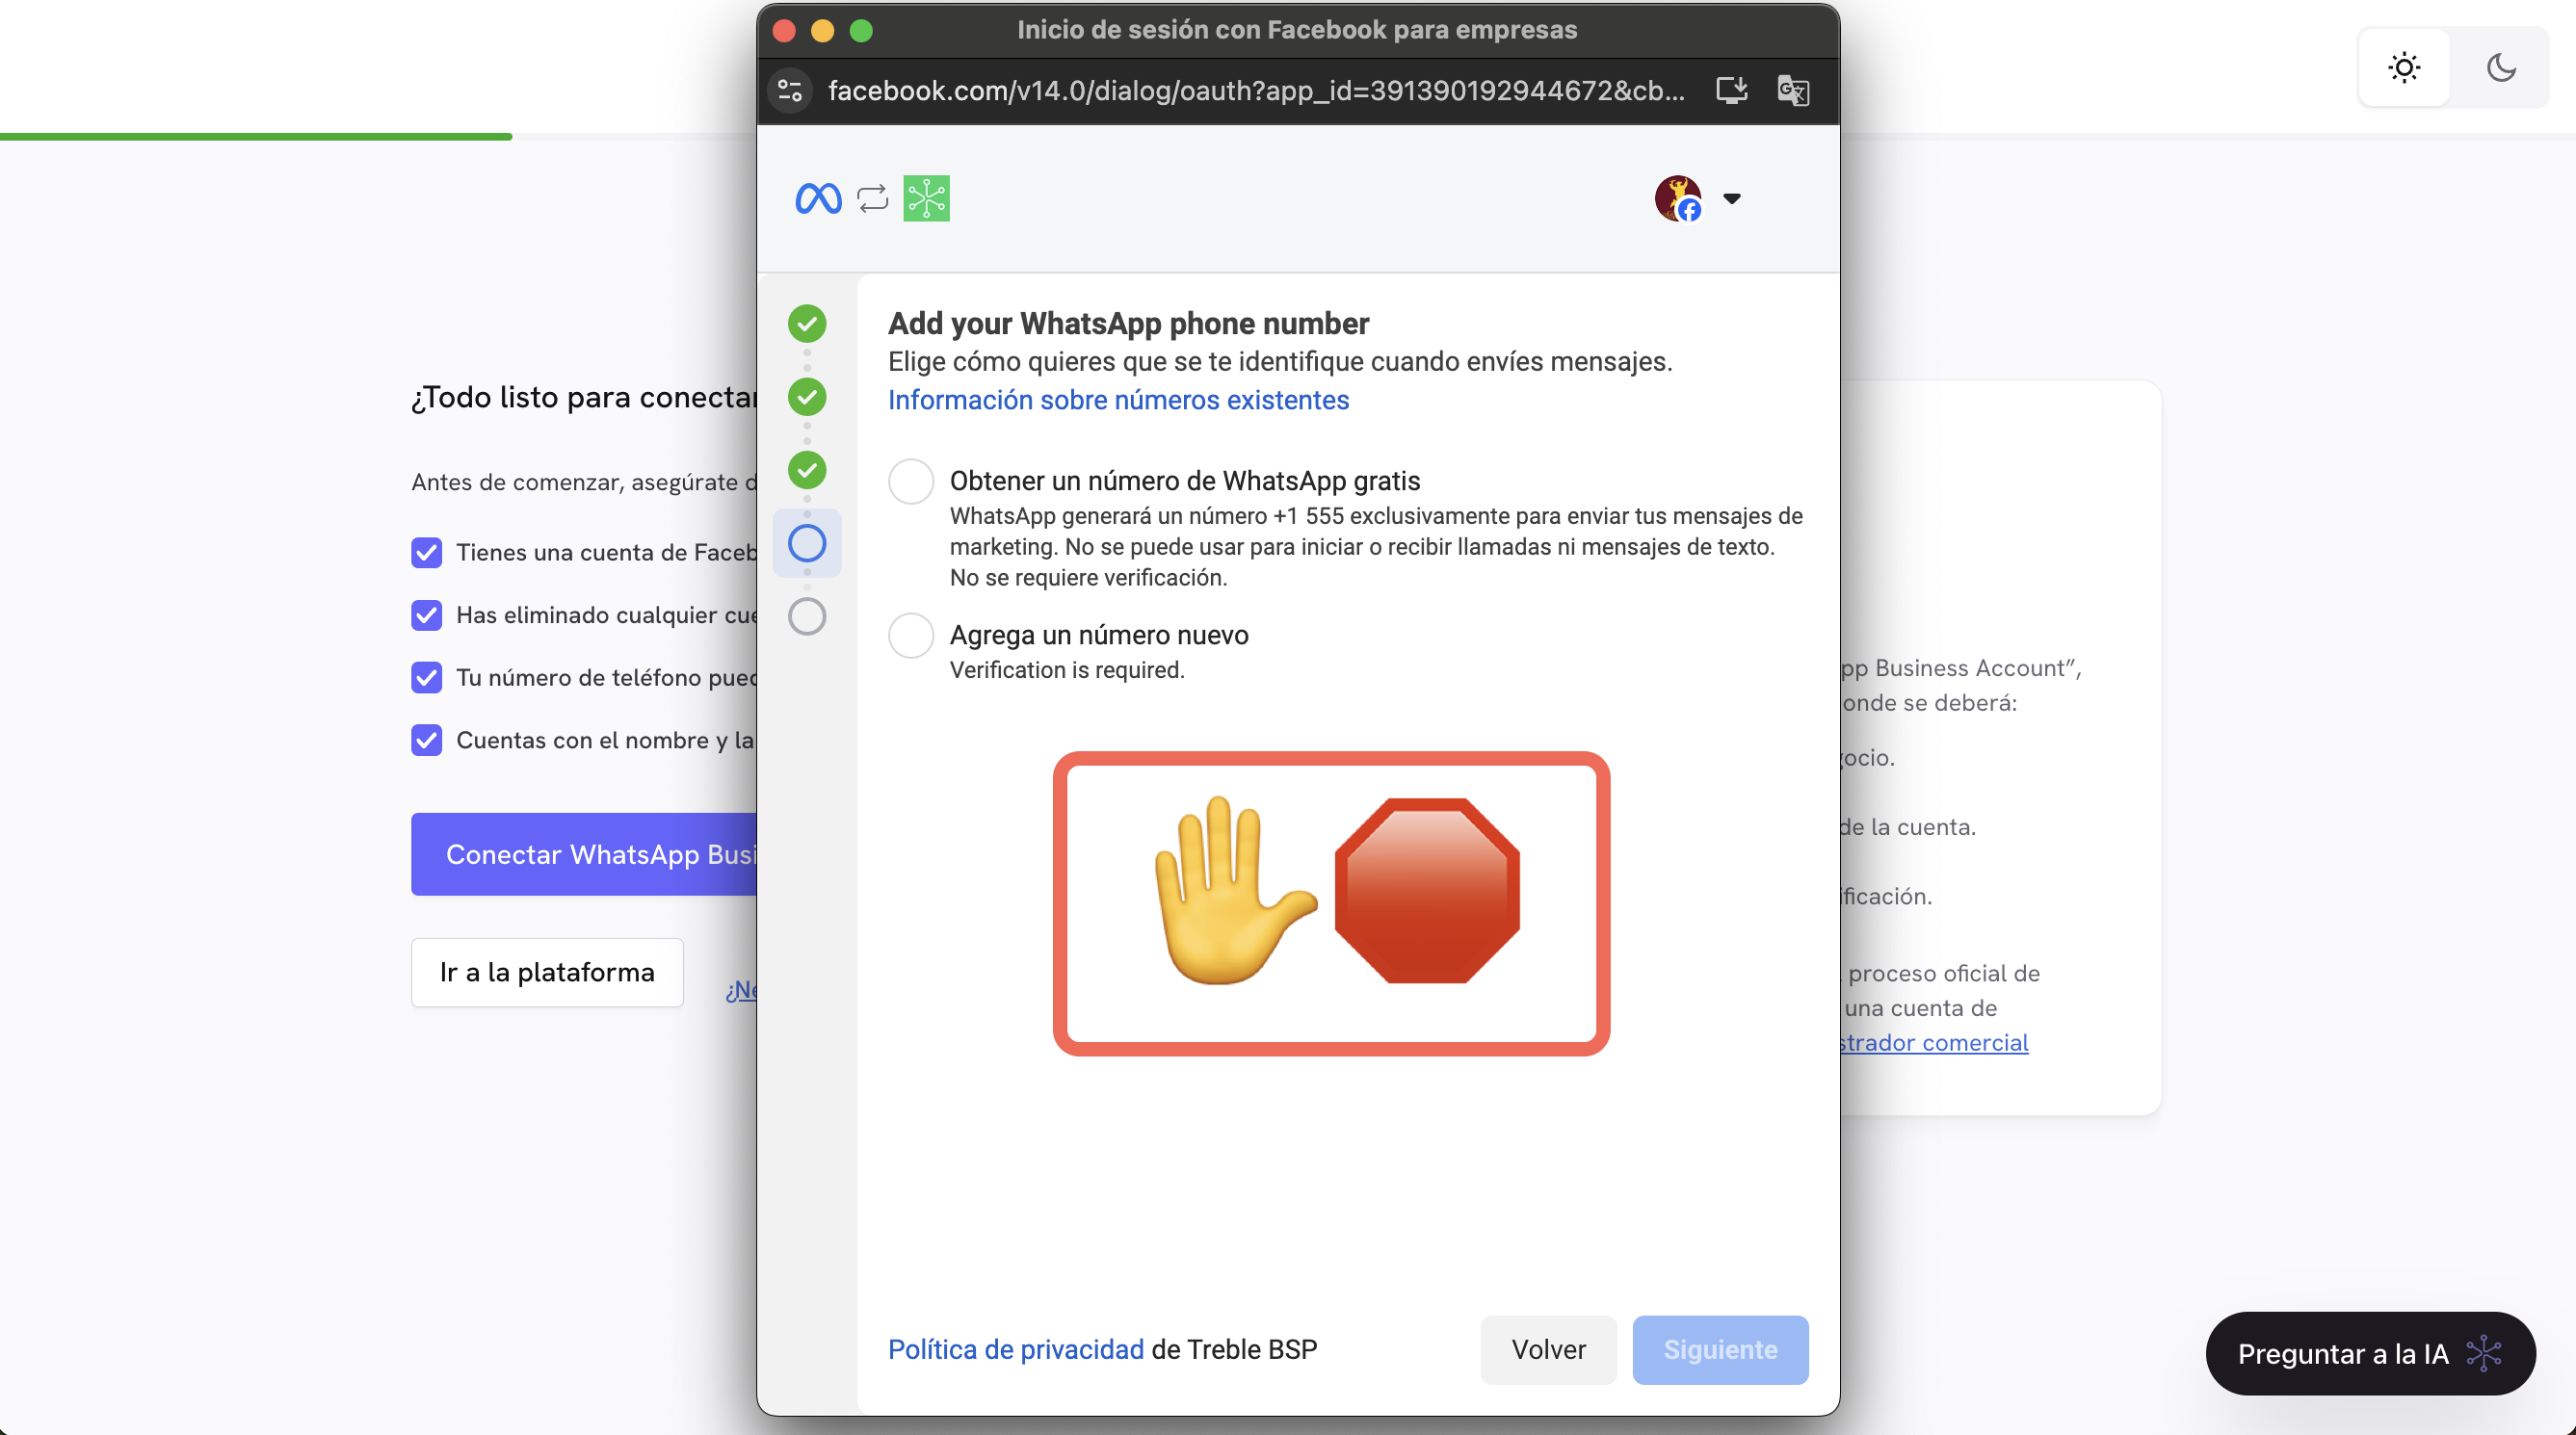
Verification process in Meta
If verification is available, follow these steps:- Click on the Start Verification button
- Follow the steps until Meta asks you to fill in your business information. If you completed the previous step of adding your business information to the business portfolio
Complete business information in the business portfolio
, many of the data will already be filled in.
- (Optional) Choose your business from the Select business dropdown menu: Meta tries to identify your business based on the information you have in your business portfolio, and you might find it in the list. If you don’t find it, you can choose the option: My business is not in the list.
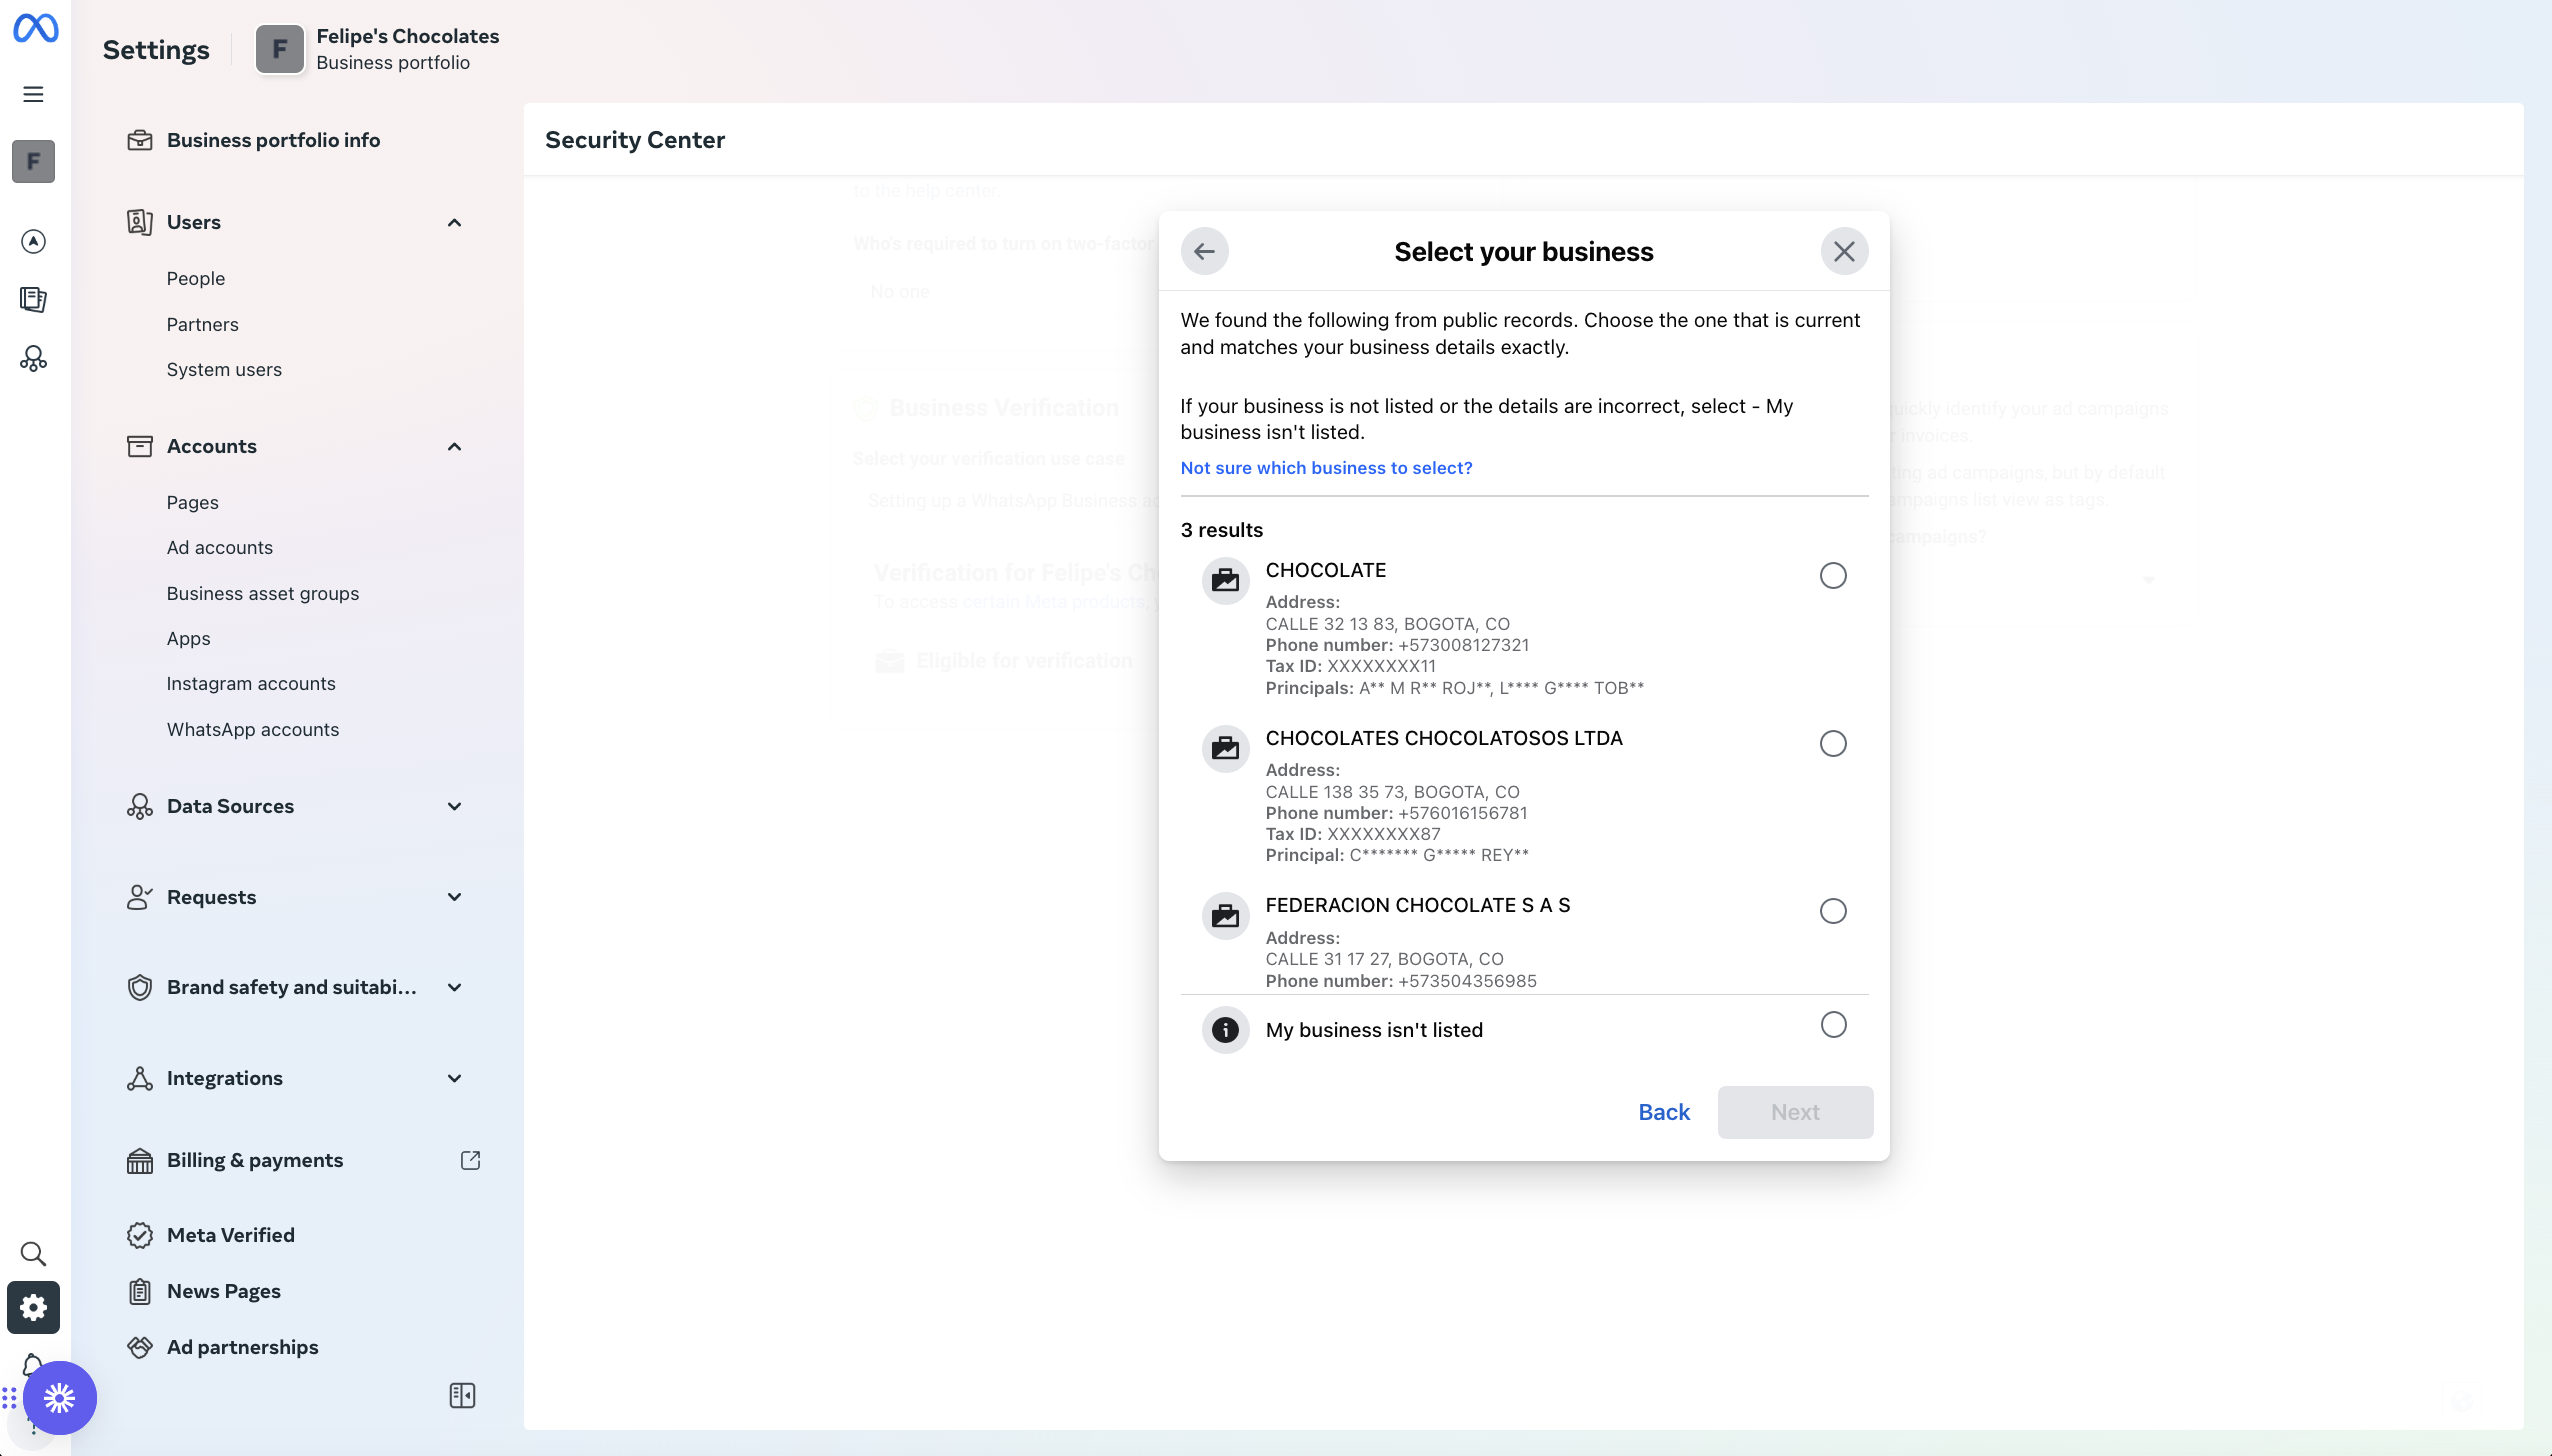
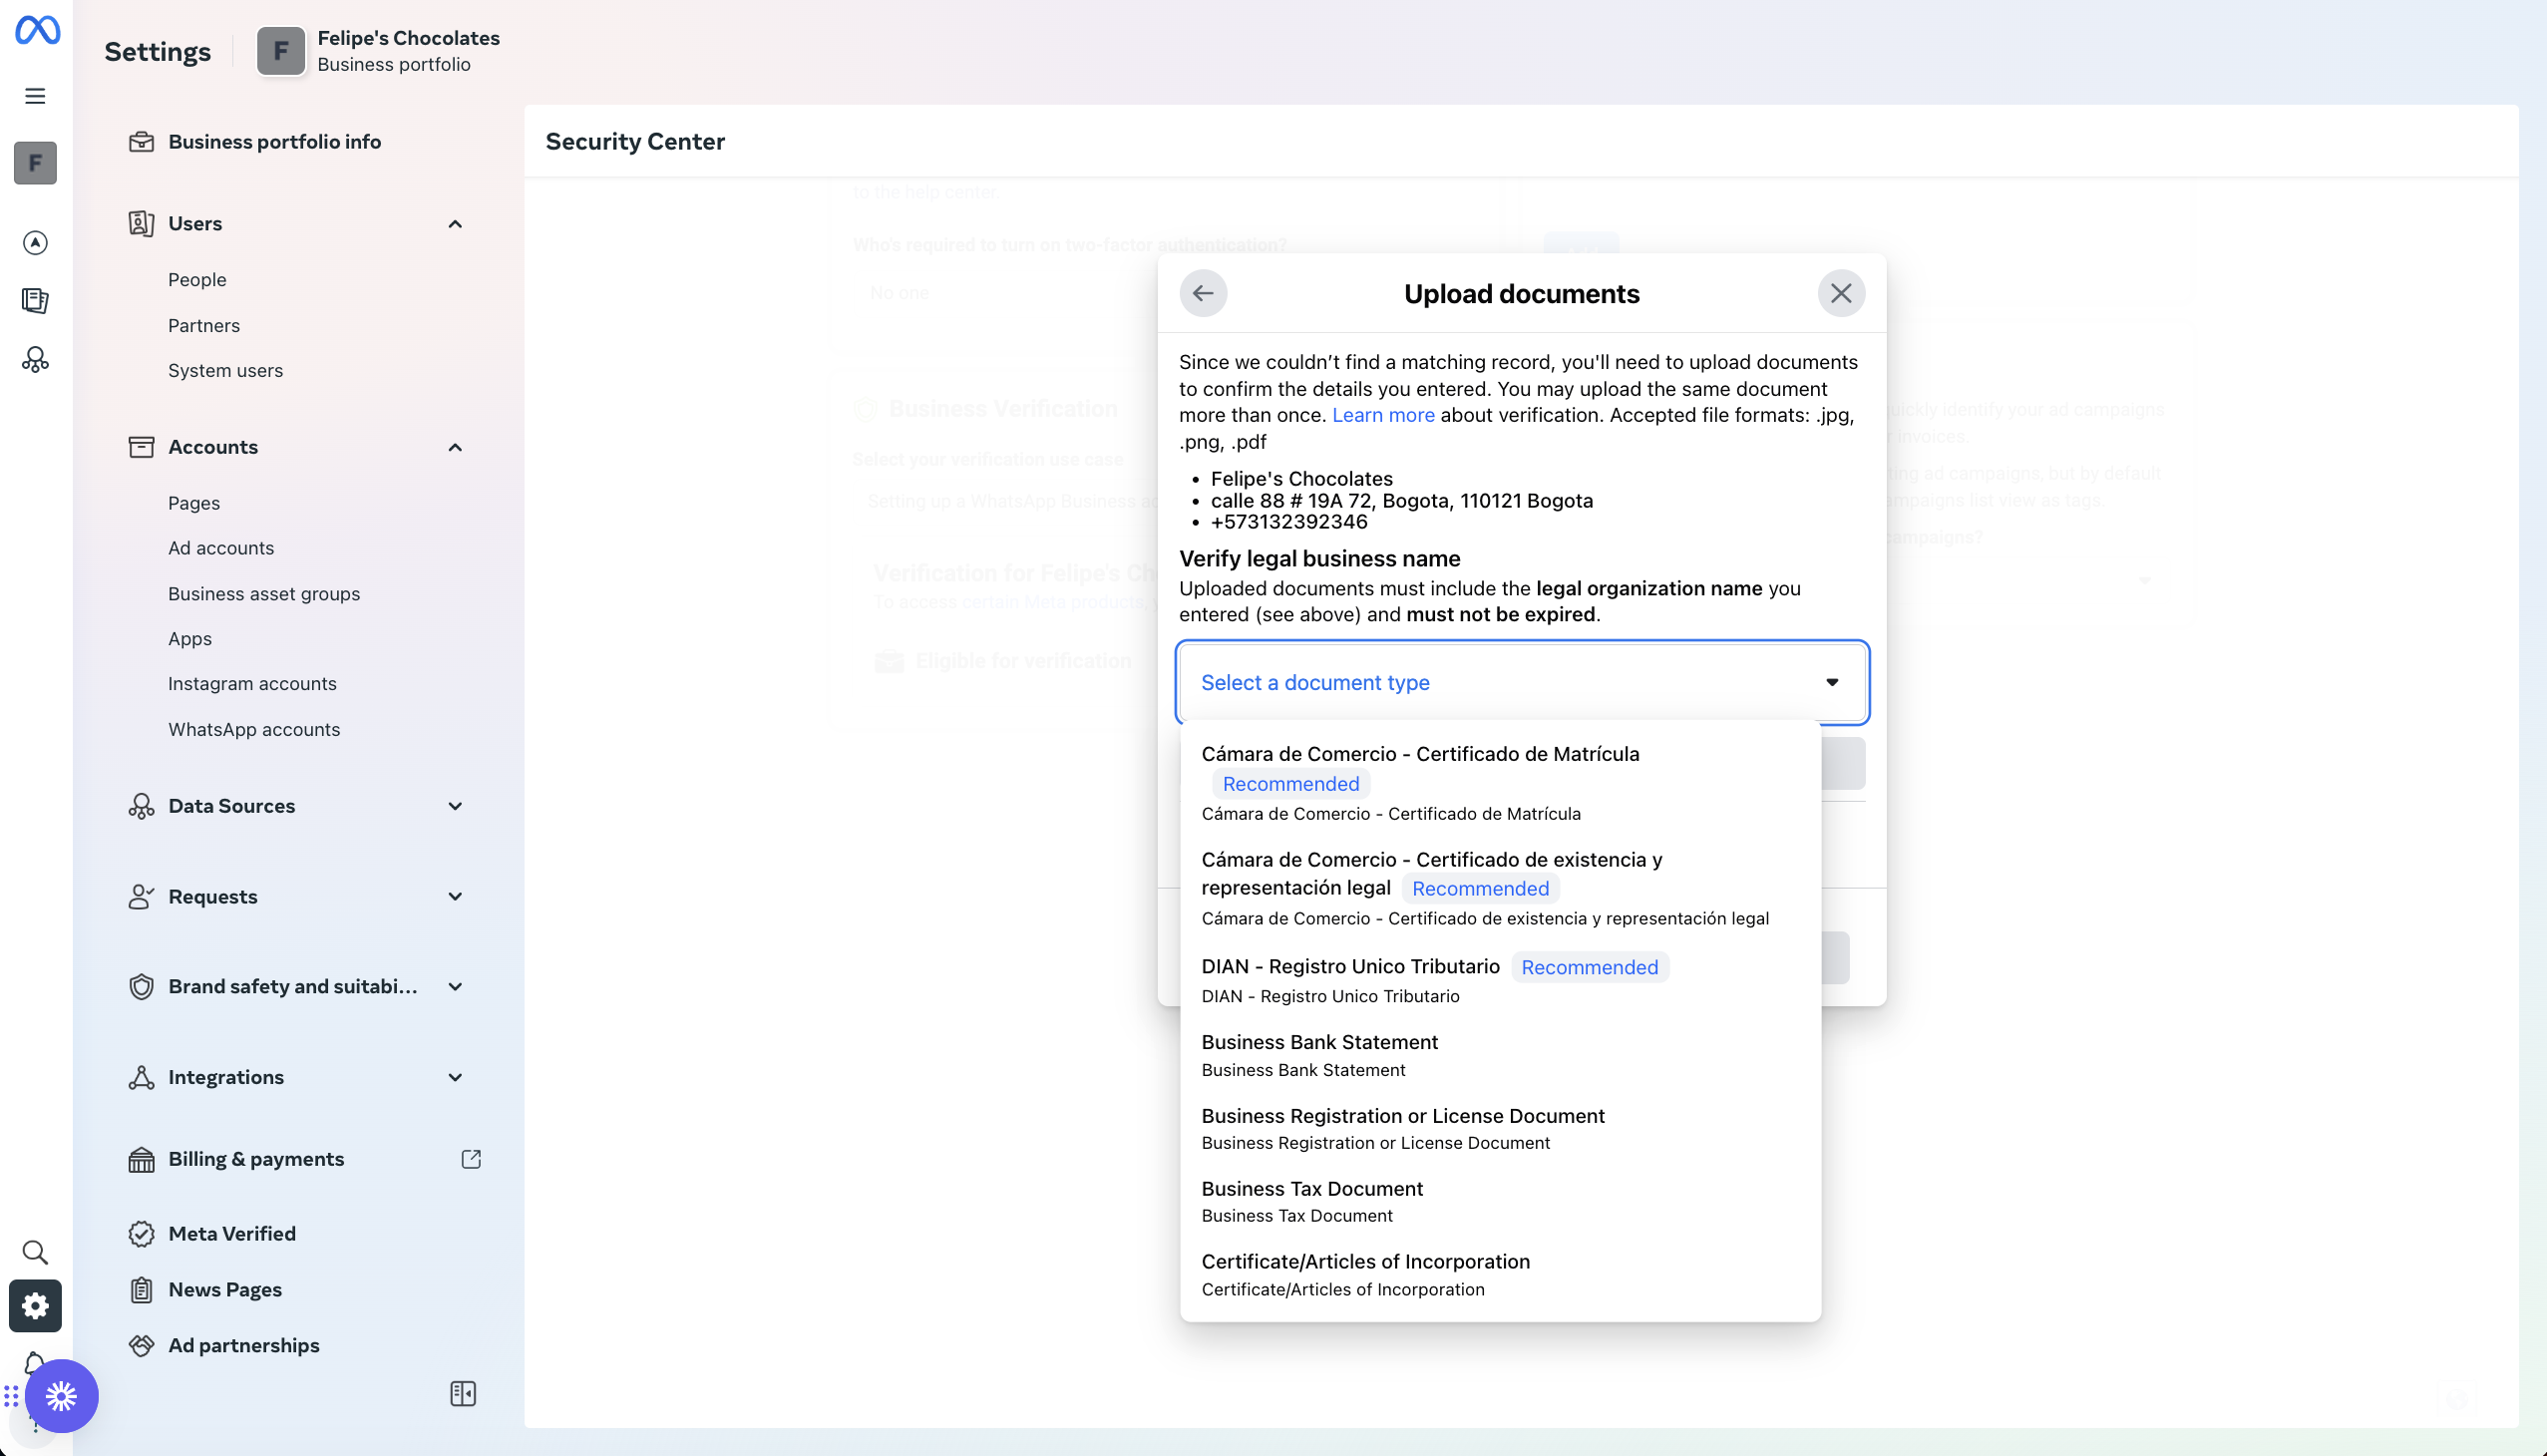
- Upload official documents: If you chose the My business is not in the list option, Meta will ask you to upload official business documents to verify it. You need to upload at least one document to continue with the verification process. If this document includes your business address and phone number, Meta will only ask you to upload that document. Otherwise, you will need to upload an additional document to verify the address and phone number.
- (Recommended) Incorporation document: If you have a document that demonstrates your business incorporation along with the address and phone number, upload a photo of the document.
- (Recommended) Tax registration: Upload a document that demonstrates your business tax registration.
- Business license: If you have a business license, upload the PDF file of the license.
- Bank statement: If you have a bank statement, upload the PDF file of the statement.
- Invoice: If you have an invoice, upload a PDF file of a service invoice used by your business, ideally the invoice should have your business address and phone number.
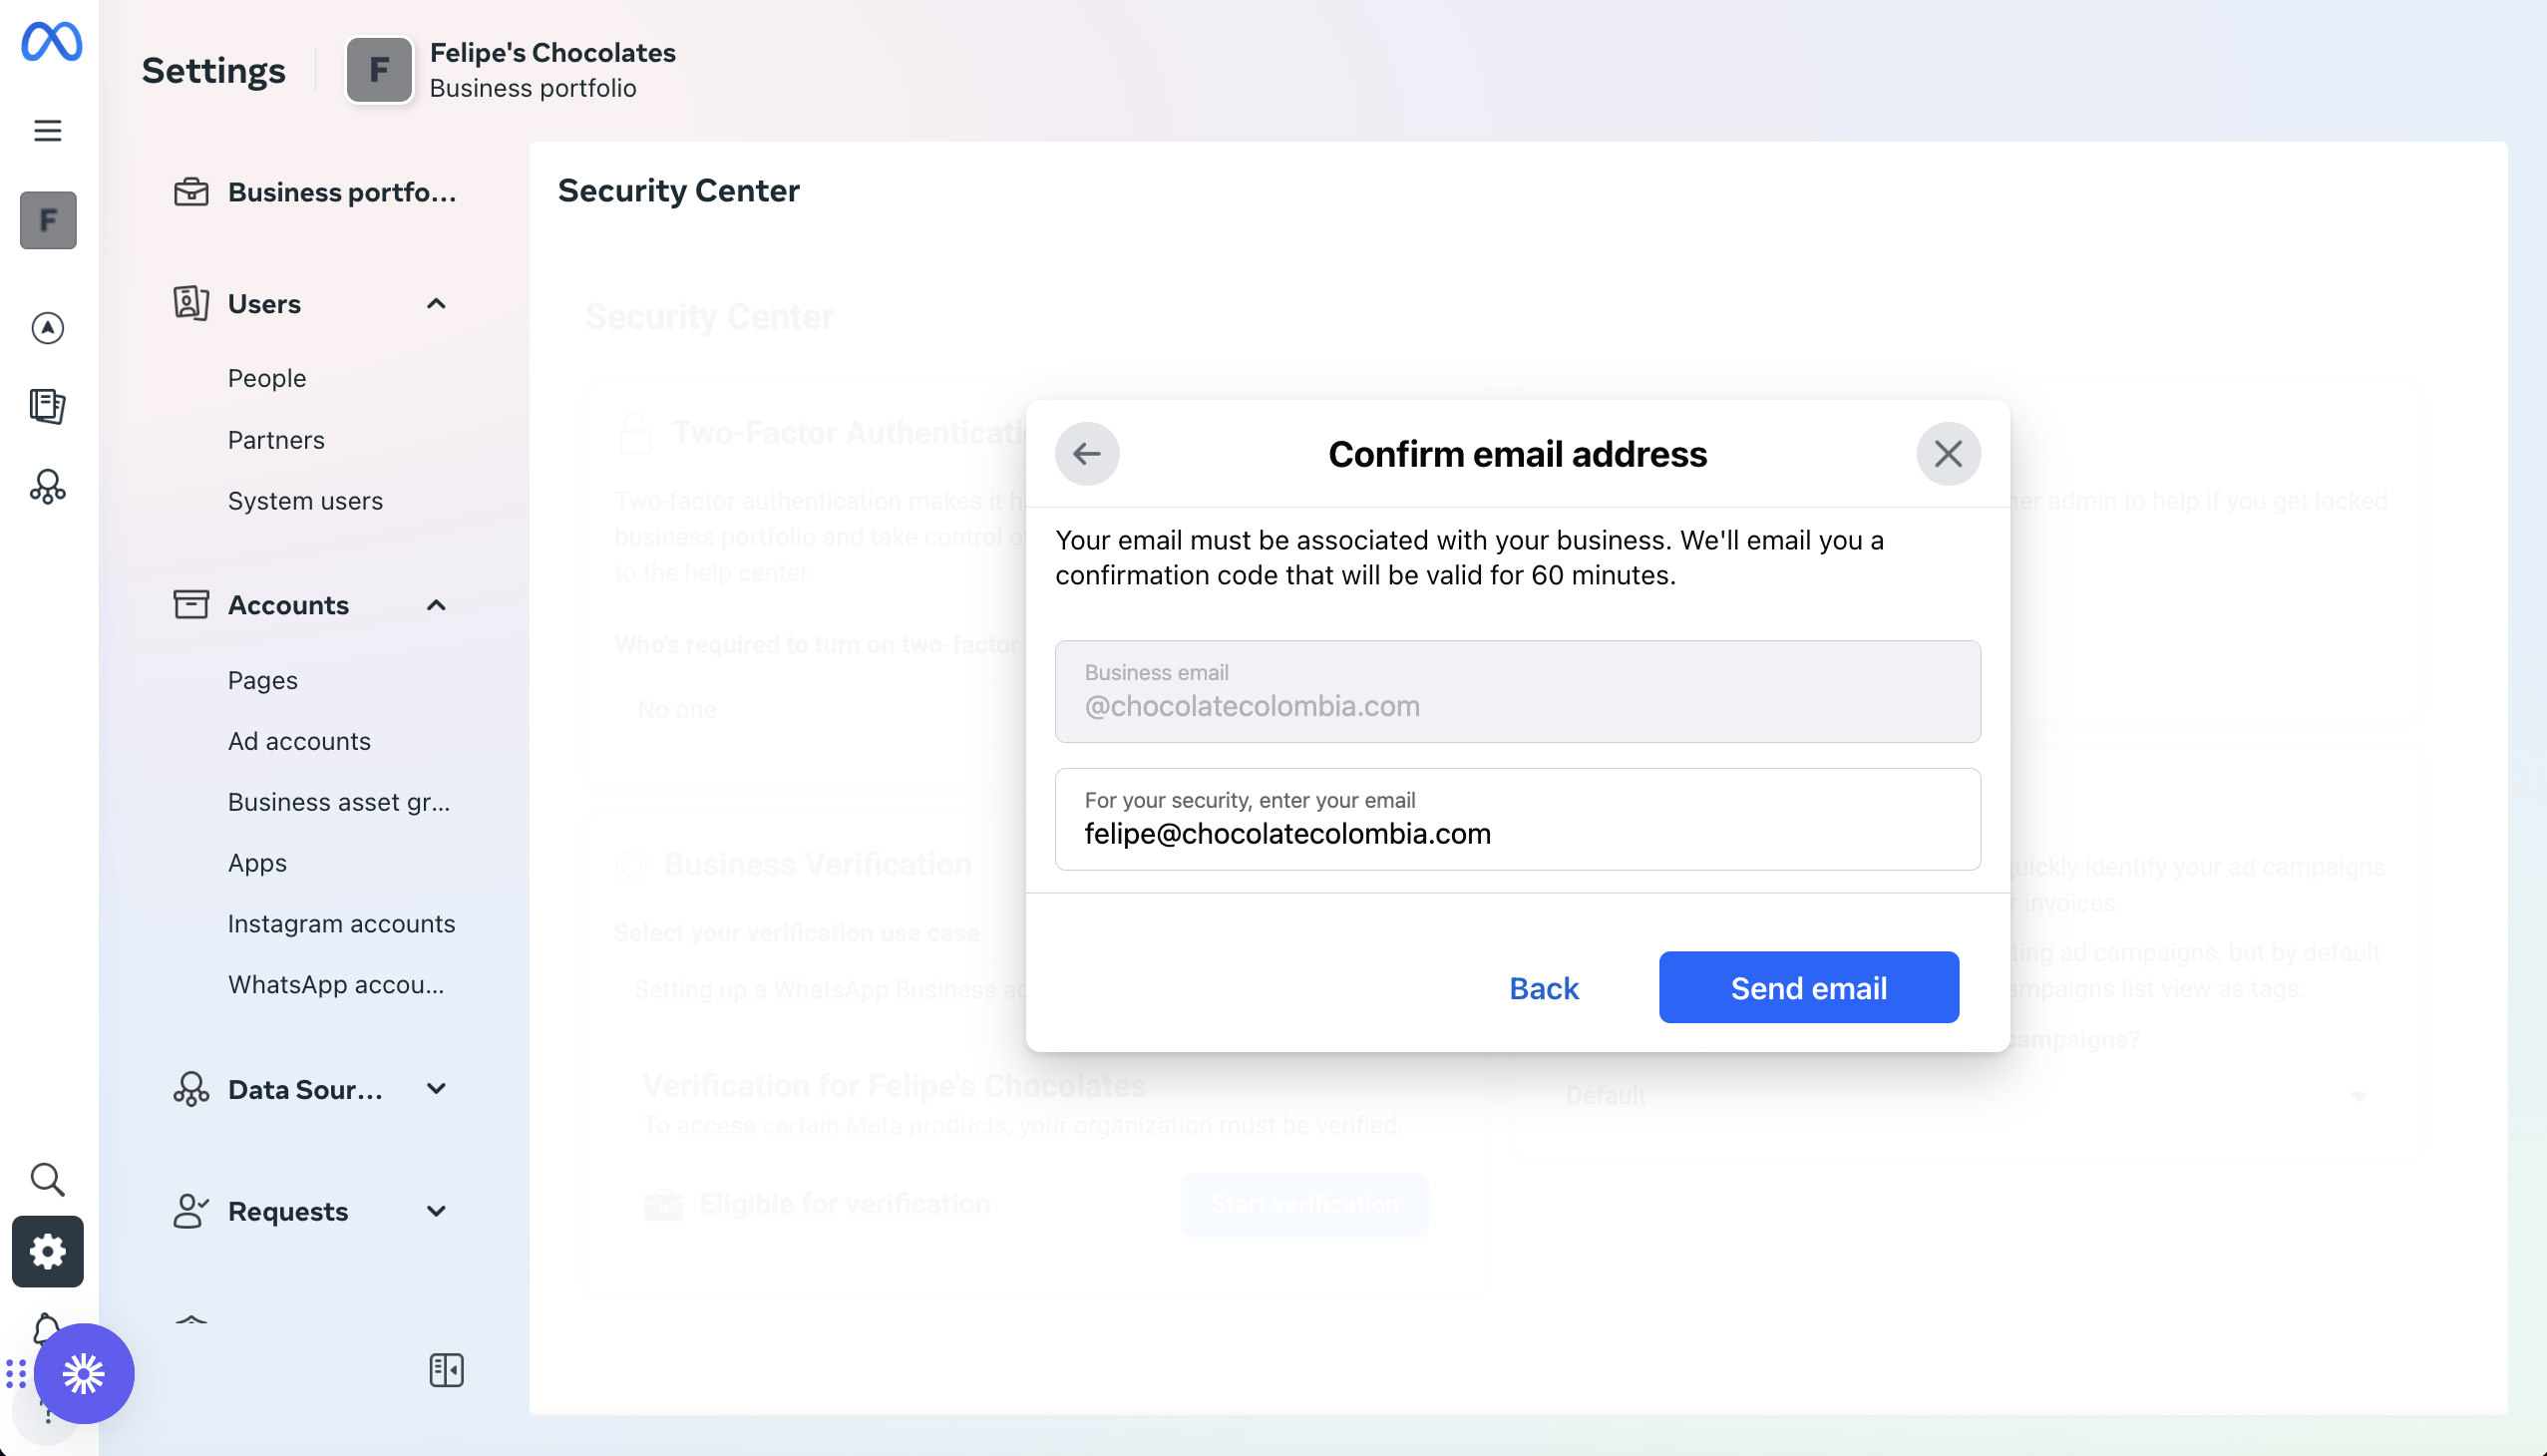
- Final step, Meta verification code: Meta will send a verification code to your email. Remember that we recommended you have an email service with your domain? Now is the time to use it. Enter an email address with your domain and write the verification code sent by Meta.
Done! Your business is now in the verification process. This process can take 1 to 2 days.
Tips and Frequently Asked Questions
How do I know when my business is verified?
How do I know when my business is verified?
Generally, Meta will notify you by email when your business has been verified. However, if you don’t receive an email, you can check the security center in Meta Business Manager.
How long does Meta verification take?
How long does Meta verification take?
Generally, Meta verification takes between 1 to 2 days. If the process takes more than 2 days, you can contact us through our support chat.
I was rejected in Meta verification - What do I do next?
If your verification was rejected, you can relaunch the verification process. However, before trying again, make sure that:- The information in the business portfolio section is complete.
- Check that your business information in the business portfolio matches your business information in the document you uploaded.
- If you selected one of the businesses that Meta suggested in the list, when you try verification again, don’t choose the same business, but the option My business is not in the list.
- Make sure your website is updated and not just a landing page.
- Make sure your website meets all the requirements listed in the
Preparing your website
section.
Exceptional Cases
In some cases, even when you meet all the requirements, Meta may not allow you to complete the verification process. In this case, you may get an error when executing the step of choosing your business, or your business may not appear in the business list. If this happens to you, you should:- Log in to your business portfolio in Meta Business Manager.
- Look for the WhatsApp Business Manager option by accessing: Settings in the left menu, then look for Accounts and in accounts select the option WhatsApp Accounts.
- If you completed the step of enabling the verification button with Treble.ai, you will see a WABA created with Treble.ai. Here, scroll in the right panel and click on the WhatsApp Manager option.
- At the top of this section, you will see a message to request a review. Click on the Request review button, and follow the steps to request a review of your account. Upon completing this step, Meta will re-enable the start verification button in the security center. This review can take between 1 to 2 days.