> ## Documentation Index
> Fetch the complete documentation index at: https://help.treble.ai/llms.txt
> Use this file to discover all available pages before exploring further.
# Install Treble in Salesforce
> In this guide, learn how to integrate Treble with Salesforce. This is something you only need to do once. Once configured, Treble will help you leverage the full potential of WhatsApp to sell more through your integration.
To install the integration of your product with Salesforce, it is crucial that the user has administrator permissions in the Salesforce org ("System Administrator" profile or equivalent).
A user with limited permissions (for example, a "Standard User" profile) won't have access to the APIs needed to complete the connection, and the integration will fail.
# Steps to install the Treble integration in Salesforce
1. Log in to app.treble.ai
2. Go to Settings
3. Go to Integrations
4. Click on "Enable" in the Salesforce section
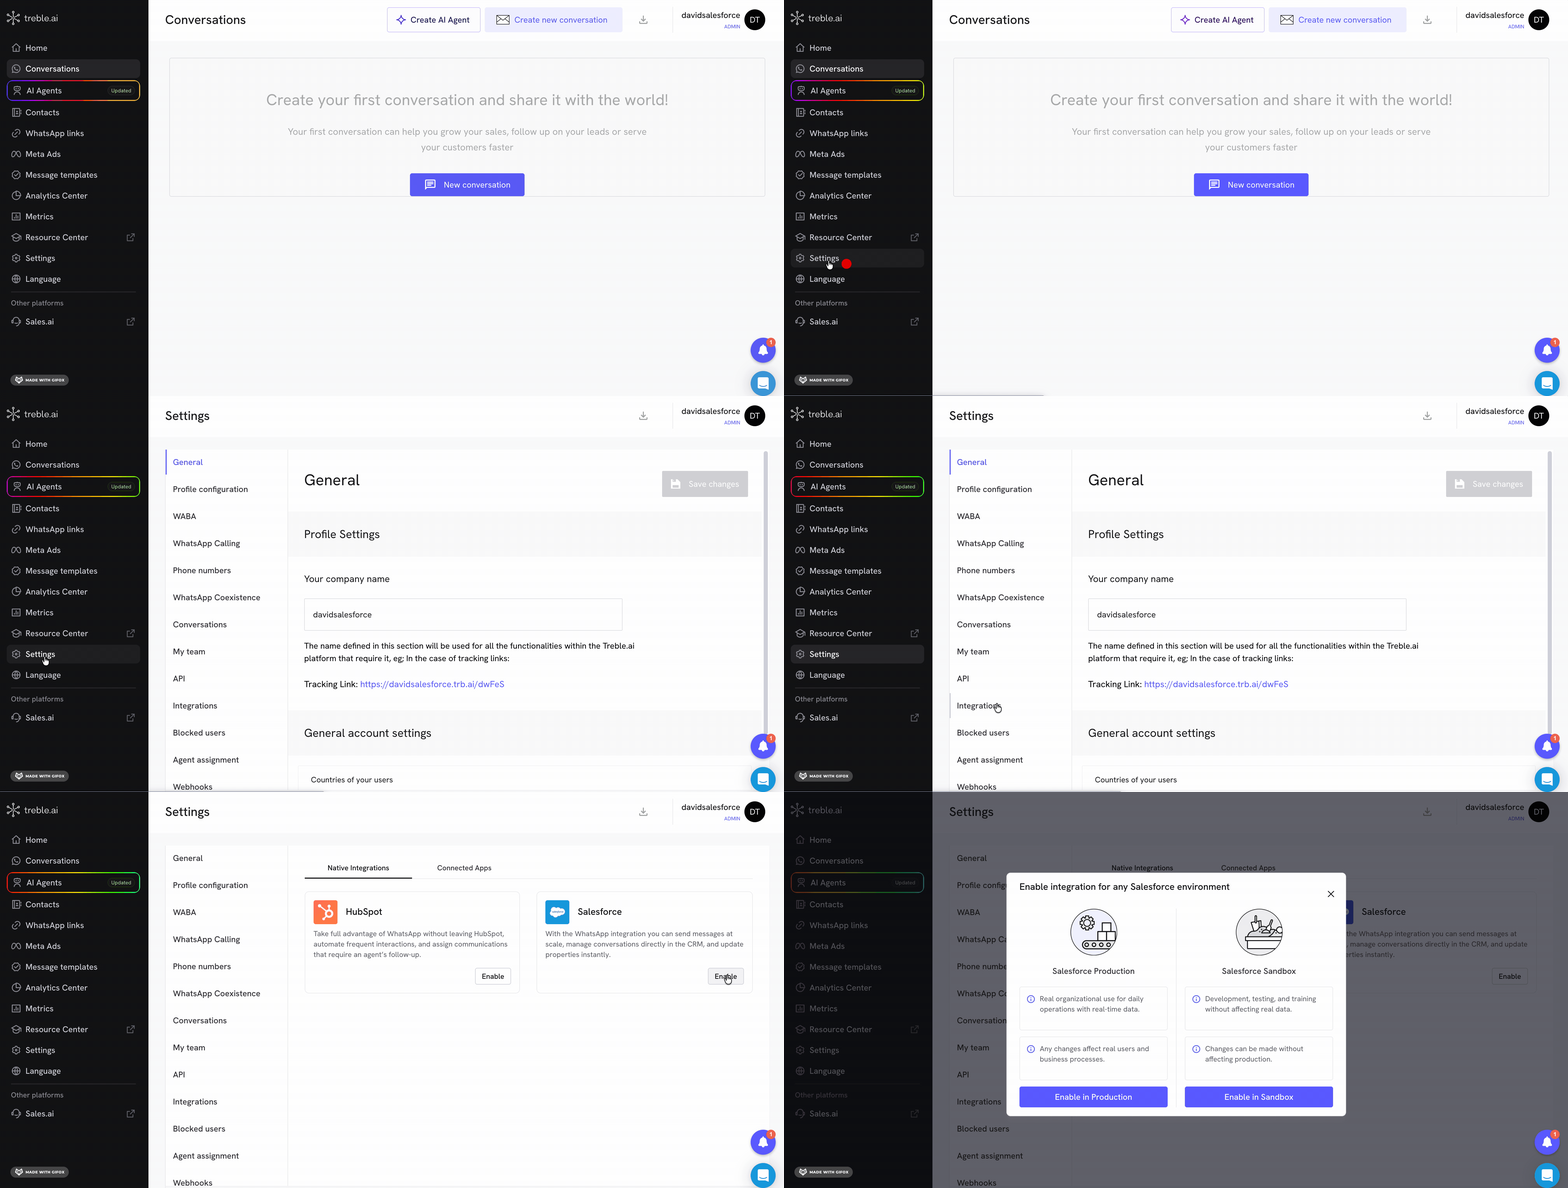 Treble lets you connect any Salesforce environment. Choose whether you're connecting your **Production** org or a **Sandbox** (usually used for testing, without affecting real data).
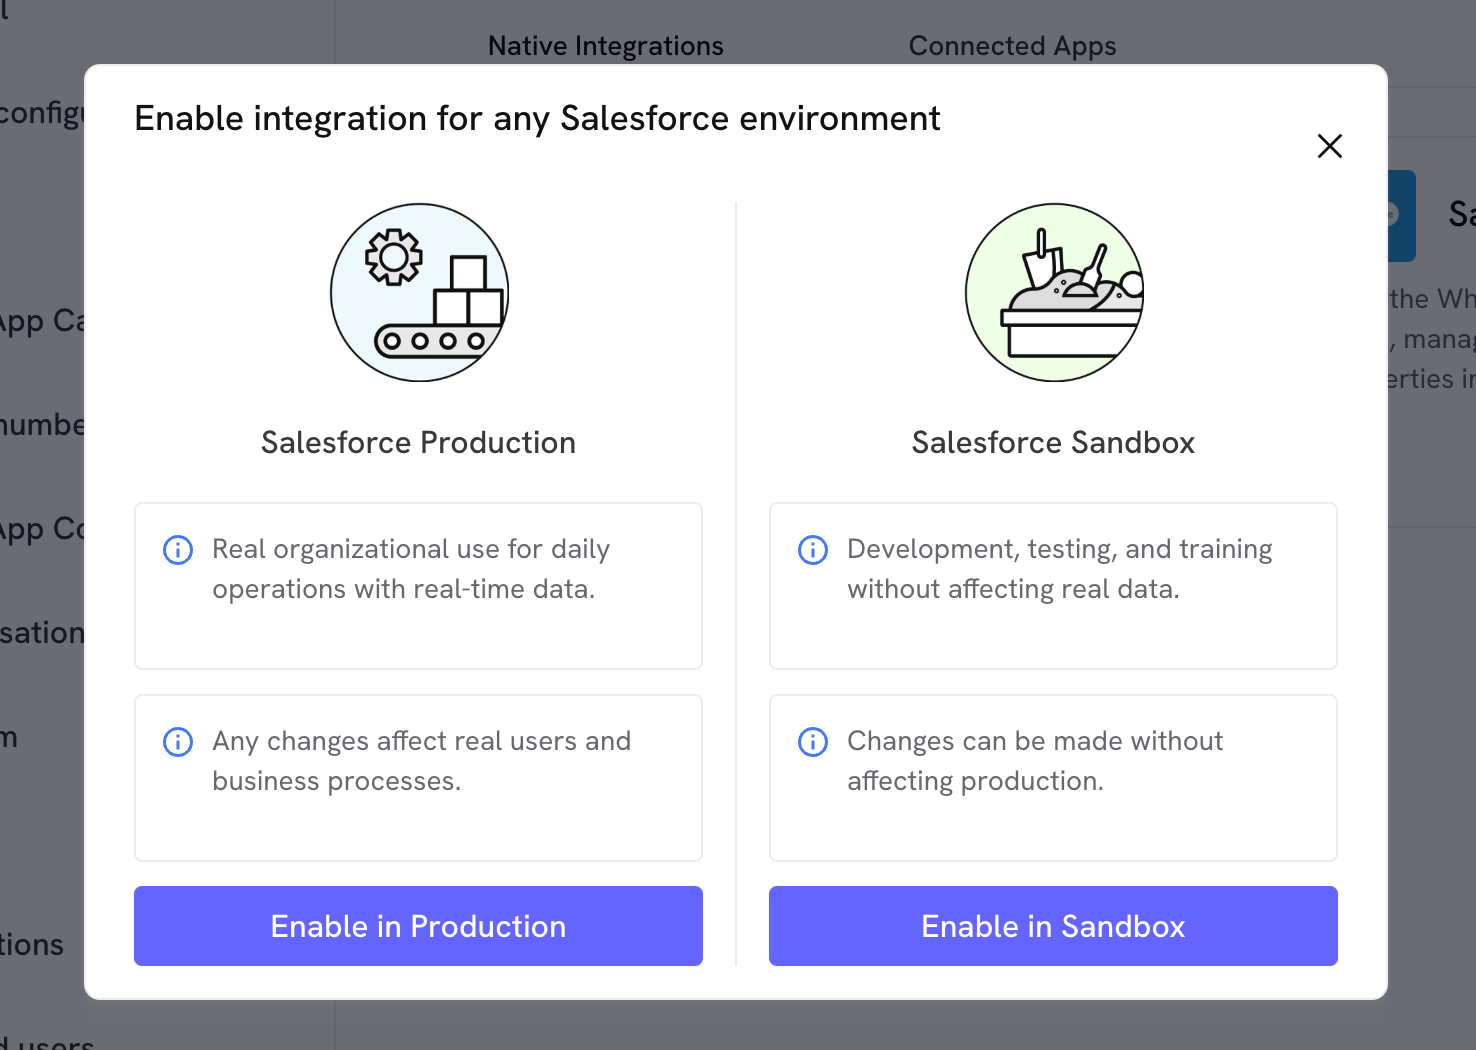 Enter the Salesforce username you're going to connect the integration with and click "Confirm".
 This will open a Salesforce window where you must log in and authorize Treble's access to your org.
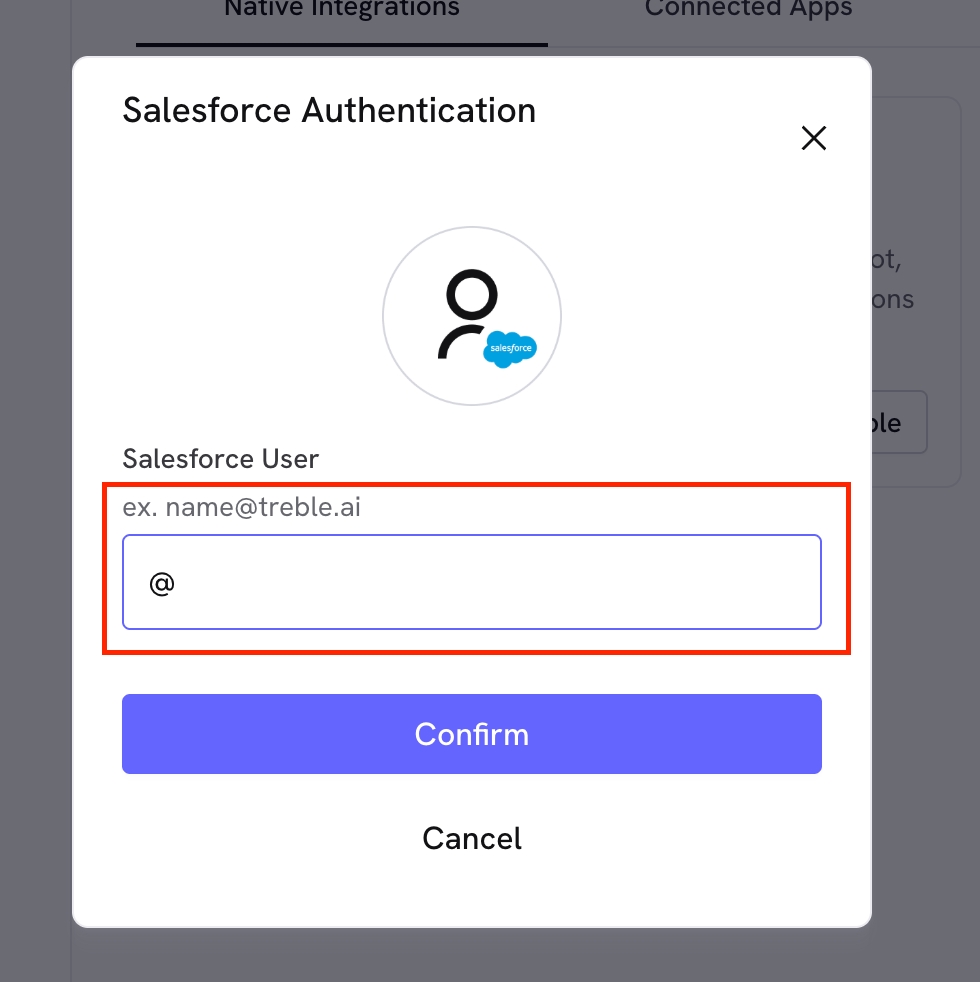
Once access is authorized, go back to Settings → Integrations → Salesforce and click "Settings" to choose the parent entity (e.g. Contact or Account) that Treble will use to sync your contacts.
This will open a Salesforce window where you must log in and authorize Treble's access to your org.
Once access is authorized, go back to Settings → Integrations → Salesforce and click "Settings" to choose the parent entity (e.g. Contact or Account) that Treble will use to sync your contacts.
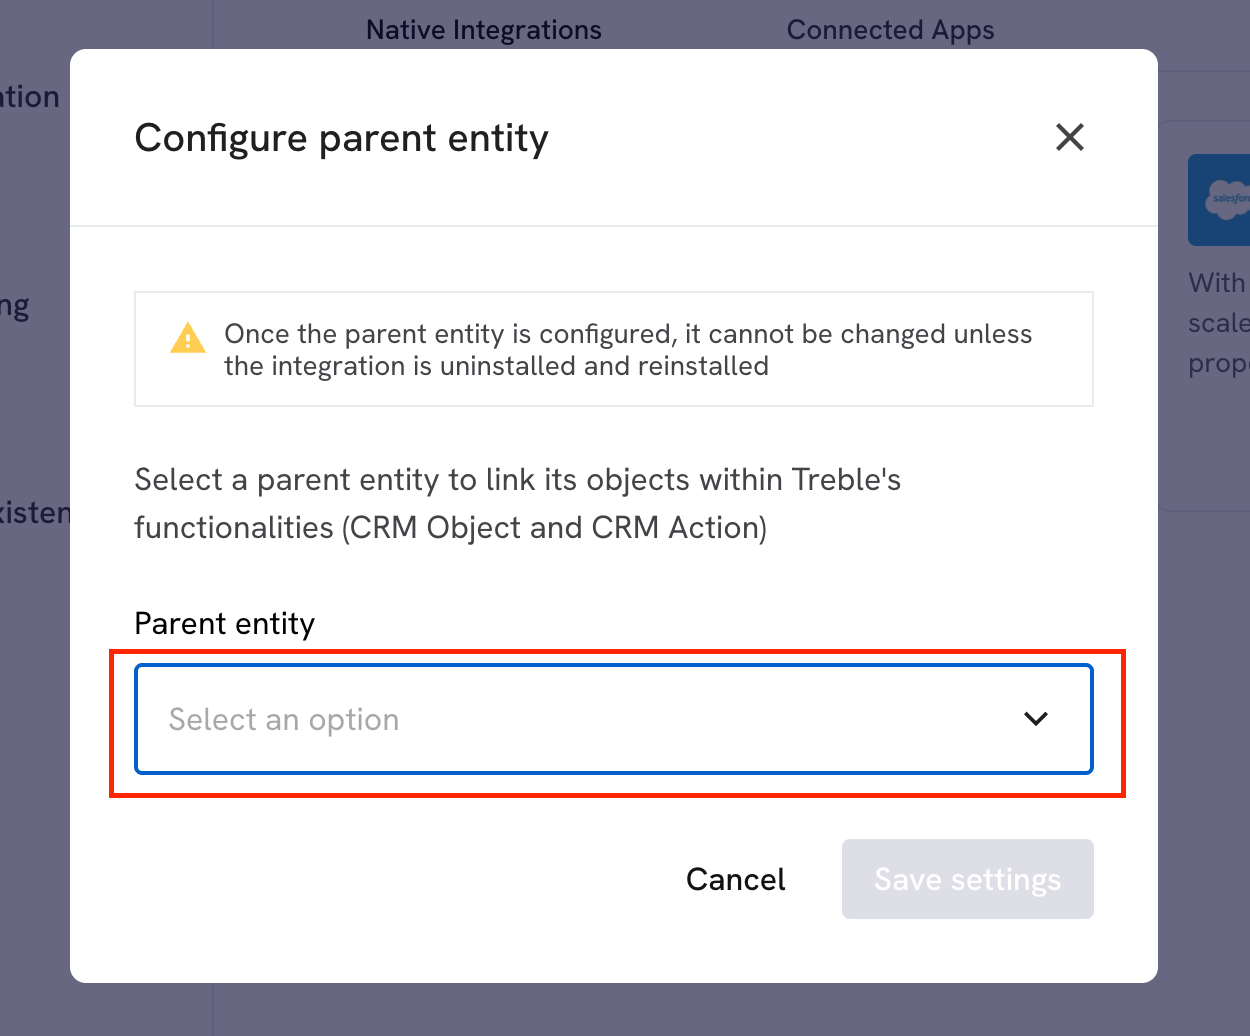 Once the parent entity is configured, you won't be able to change it unless you uninstall and reinstall the integration.
Click "Save configuration" to continue.
If your integration is of type **Salesforce Multiple Object**, this step looks different: instead of choosing a single parent entity, you'll see "Select objects to install" and can choose **several Salesforce objects** at once. For each object you select, you'll need to configure its phone field, name field, and owner field. The rest of the flow (authentication, agent selection, sync) is identical.
Right after saving the configuration, Treble automatically opens a modal so you can choose which Salesforce users you want to turn into Treble agents.
Once the parent entity is configured, you won't be able to change it unless you uninstall and reinstall the integration.
Click "Save configuration" to continue.
If your integration is of type **Salesforce Multiple Object**, this step looks different: instead of choosing a single parent entity, you'll see "Select objects to install" and can choose **several Salesforce objects** at once. For each object you select, you'll need to configure its phone field, name field, and owner field. The rest of the flow (authentication, agent selection, sync) is identical.
Right after saving the configuration, Treble automatically opens a modal so you can choose which Salesforce users you want to turn into Treble agents.
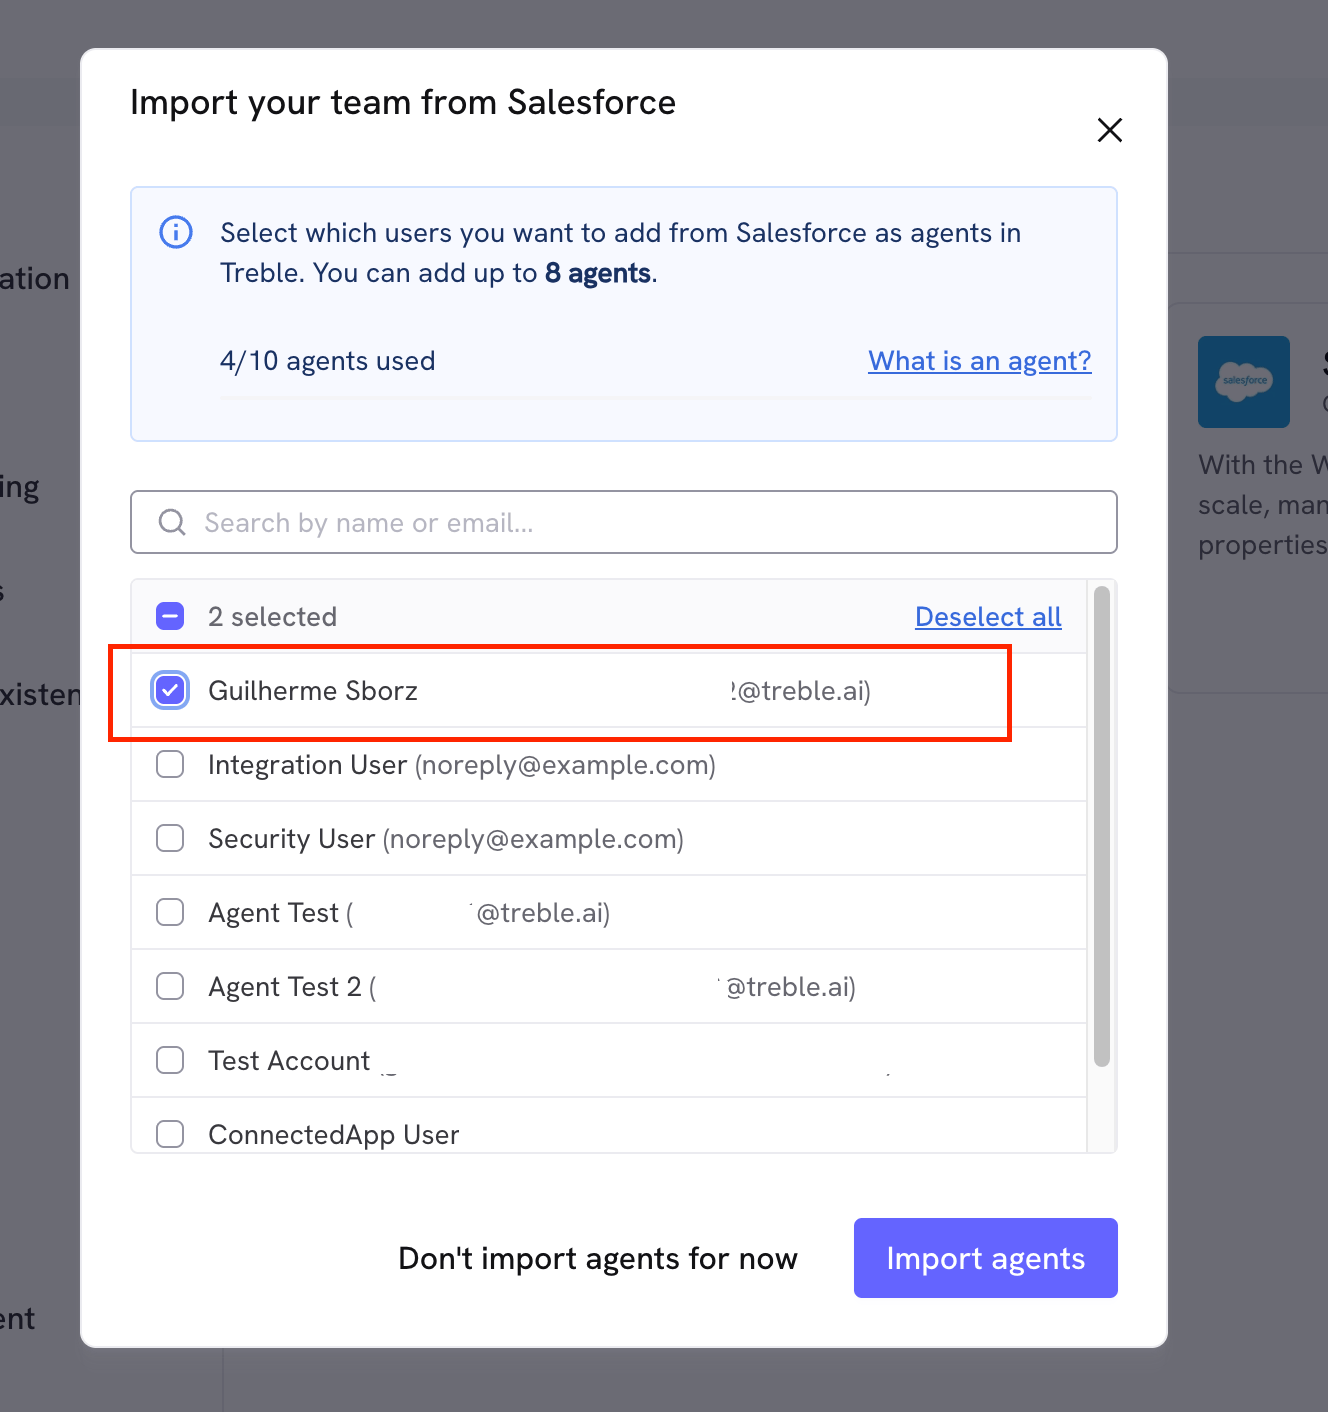 You can search by name or email, select users one by one, or use "Select all". The counter at the top (e.g. "1/10 agents used") reflects your plan's limit — you won't be able to select more users than you have available.
If you don't want to add agents right now, you can click "Don't import agents for now". Keep in mind this modal won't show up again afterward — if you want to add agents later, you'll have to do it manually, one by one. See [Create a new agent](/en/docs/agent-platform/admin/tags-teams#create-a-new-agent).
If you select the user you authenticated with in Salesforce, that agent will automatically be created with the **Admin** role. See [Agent Roles](/en/docs/agent-platform/admin/tags-teams#agent-roles) for more information.
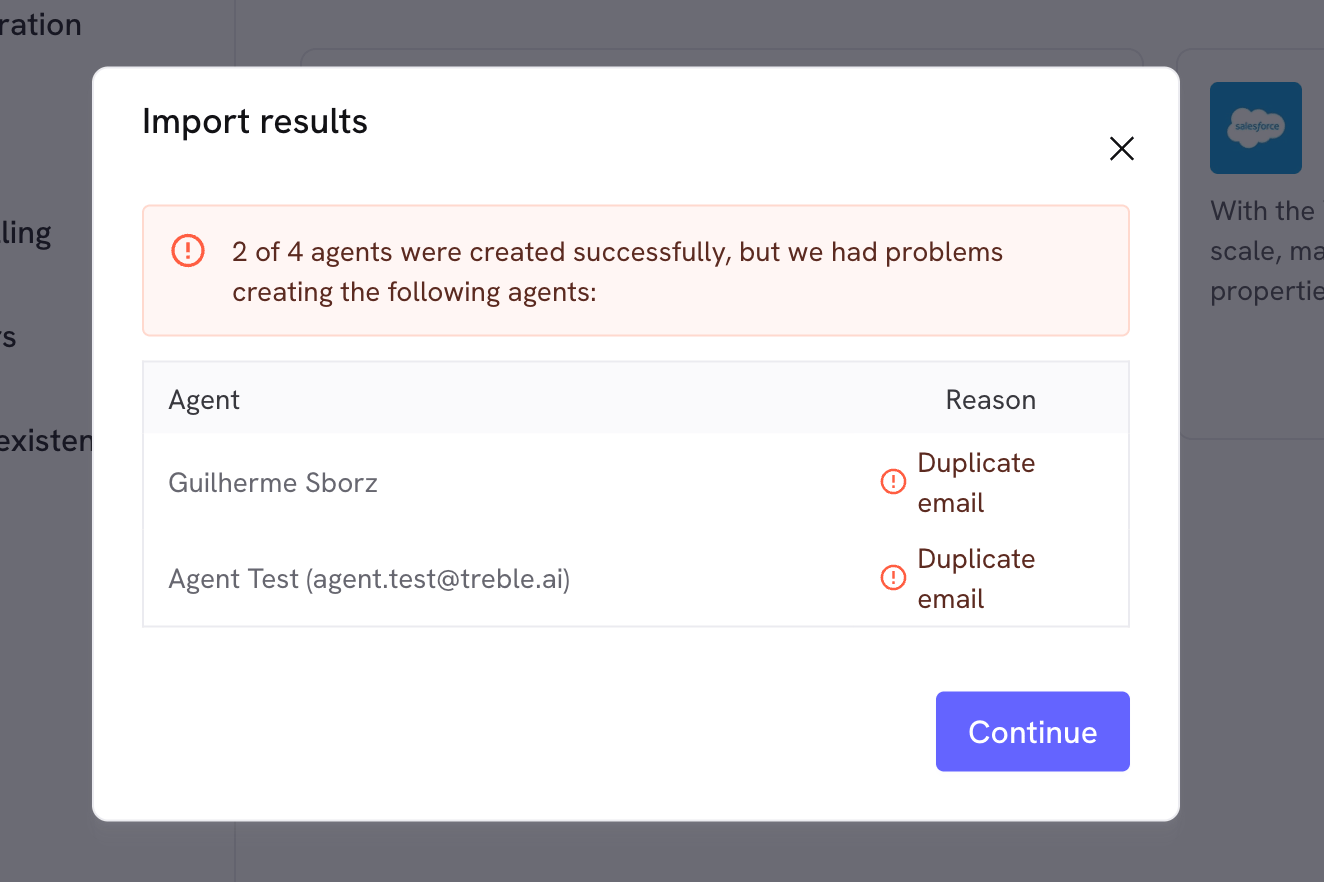
On confirm, Treble creates the selected agents. If any of them couldn't be created (for example, because the email already exists as an agent), you'll see a summary showing which ones failed and why.
You can search by name or email, select users one by one, or use "Select all". The counter at the top (e.g. "1/10 agents used") reflects your plan's limit — you won't be able to select more users than you have available.
If you don't want to add agents right now, you can click "Don't import agents for now". Keep in mind this modal won't show up again afterward — if you want to add agents later, you'll have to do it manually, one by one. See [Create a new agent](/en/docs/agent-platform/admin/tags-teams#create-a-new-agent).
If you select the user you authenticated with in Salesforce, that agent will automatically be created with the **Admin** role. See [Agent Roles](/en/docs/agent-platform/admin/tags-teams#agent-roles) for more information.
On confirm, Treble creates the selected agents. If any of them couldn't be created (for example, because the email already exists as an agent), you'll see a summary showing which ones failed and why.
 After selecting your agents, Treble starts syncing your Salesforce contacts in the background. This process can take a while depending on the size of your contact base — in the meantime, you'll see the integration in "Processing" status.
Congratulations! At this point, you have already integrated your company with Treble and Salesforce. Once the sync finishes, you'll see the integration as "Connected".
After selecting your agents, Treble starts syncing your Salesforce contacts in the background. This process can take a while depending on the size of your contact base — in the meantime, you'll see the integration in "Processing" status.
Congratulations! At this point, you have already integrated your company with Treble and Salesforce. Once the sync finishes, you'll see the integration as "Connected".